Compendium of Colure: The Art of Geomancy
|
Roles
- "The ancient geomancers realized that the answer wasn't to control the land ... but rather let themselves be swept up by its current and borrow some of its strength."
- ~ Sylvie
A Geomancer is able to fill the role of support, magic damage dealer, enfeebler, and a secondary healer. In the primary role of support, a Geomancer aids the party with the use of Indicolure and Geocolure spells casting varying buffs and debuffs which can compliment each other and what the content the party is tackling. Indicolure spells are acquired by the use of a plate, similar to a spells scroll, and are either purchased from a vendor, the Auction House, or as a drop from a battlefield. With an indicolure spell geomancers are able to focus themselves as the conduit to emanate a spells effect. As a geomancer develops its own skill their luopan will resonate with the world, and when attuned to its calling, will learn the respective geocolure spell. When the geomancer uses a debuffing colure spell they must be on the enemy's enmity list in order for the spell to take effect. They can achieve this by casting a fast enfeebling spell such as Dia or Diaga on the enemy or by healing the tank which is on the enmity list. Failure to do so will result in a debuffing colure spell not to effect the enemy.
Geomancers secondary role is to serve as an magical damage dealer with their elemental magic and their own -ra variant spells which like an indicolure spell, emanates from the geomancer to hit all enemies within range. Through the use of the Cardinal Chant trait, a geomancer's elemental magic gains a boost based on the geomancer's direction in relation to the target. While their own variants of elemental-ra spells have an increased boost compared to other elemental spells, a geomancer would benefit from using this trait to gain benefits such as increased Magical Critical Rate or a Magical Attack Bonus.
A geomancer has a the same enfeebling magic skill as a Black Mage and the Geomancy Attire Set has a significant amount of Magic Accuracy. While they do no have the same amount or calibur of enfeeblings spells as a Red Mage, only having access to Sleep and Sleep II natively, they are able to benefit from using the lower tier spells they gain from having a Black Mage or Red Mage as a sub job. Spells such as Gravity or Bind still have a use in all content in the means of crowd control and the increased Magic Accuracy ensures that a Geomancer can aid in landing these spells.
While only having a handful of dark spells, the geomancer has a high skill allowing it to benefit from using Drain and Aspir to quickly regain lost health and mana in order to continue their volley of spell casting. Through the use of having Black Mage as a subjob, Geomancer gains access to Stun allowing for an additional means to block powerful but slow casting spells and TP moves from enemies.
Lastly, while they have no native healing magic skill, a geomancer with either Red Mage, White Mage, or Scholar as a subjob gains access to various cure spells. A well geared geomancer can aid in battle by using the additional MP they have to heal other front line jobs allowing dedicated healers to either focus on the tank or on removing status aliments form the party.
Indicolure
- "Indicolures are self targeted spells which emanate from the Geomancer"
- ~ Ruaumoko, Final Fantasy XI: Geomancer Guide, 2017
A Geomancer's indicolure spells originate around the caster, or if used with Entrust, around the party member, adding buffs to party members or debuffs to enemies within the indicolure's radius. Indicolure spells are not effected by any abilities except for Bolster and those used with Entrust are not granted any Geomancy Potency effects from equipment such as the Nepote Bell or Dunna. An indicolure spell could provide an enemy with a debuff such as slow, paralysis, or decrease their attack, but only takes effect if the Geomancer is on the enemy's enmity list. The use of elemental or enfeebling Magic to end up on the enmity list is common practice, or by healing the tank after it establish hate on an enemy. Any party member that is entrusted with an indicolure spell must also be on the enemy's enmity list in order for the indicolure to effect the enemy.
|
| |||||||||||||||||||||||||||||||||||||||||||||||
|
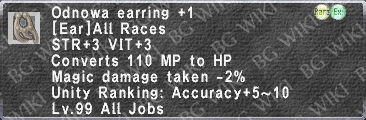
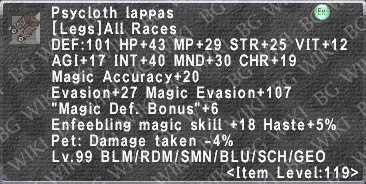
Initially you can gain up to 42 seconds on top of the 180 second base duration of any Indicolure spell. |
With an increase of 50 seconds, the duration bonus from the Lifestream Cape is multiplicative, meaning that you will gain 10% duration from the 230 seconds your Indicolure spells are boosted to, resulting in a 253 seconds (4:13) duration. |
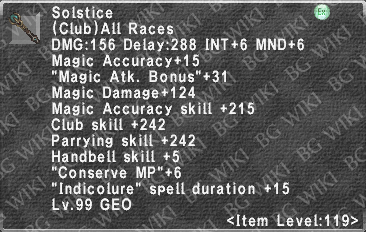
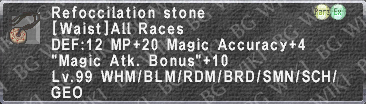
Once you unlock the Idris, you would only use a Solstice or Gada when using Entrust. Pellucid Stones and Taupe Stones have a maximum augment of +10% duration while Fern Stones have a maximum augment of +11% duration. Even with a 8% duration increase, coupled with the 20% duration increase (maximum augment) on the Lifestream Cape, you can see an Indicolure spell duration of 346 seconds (5:46), assuming you have fully invested in the Indicolure Spell Effect Duration job points. |


Geocolure
All geocolure spells summon a Luopan which the geocolure effect emanates from. It is important to remember that you will need 900 combined skill for maximum potency, and any additional Geomancy Potency, from pieces such as a Dunna or Idris, are static values regardless of combined skill. When building sets as a new Geomancer, you will have two sets, one casting the geocolure spell, the other when the Luopan summoned. Luopans have a native -50% Damage Taken, so look to maximize the damage taken pieces followed by regen so you Luopan will remains active, achieving the 10 minute time limit.
A Geomancer's abilities effect the Luopan, but Bolster does not stack with Ecliptic Attrition or Blaze of Glory.
|
|
| |||||||||||||||||||||||||||||||||||||||||||||||||||||||||||||||||||||
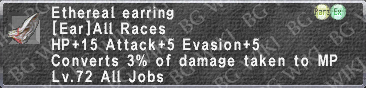
| With a base perpetuation cost of 24 HP/tic, your Luopan will last approximately 210 seconds at level 99. Increasing the amount of regen to offset the perpetuation cost will allow the Luopan to remain out before finally despawning after 10 minutes. The Luopan has a base -50% Damage Taken trait like all other pets, and can be increased to the cap of -87.5% Damage Taken. | As you slowly work your way through gear progression, the Geomancy Mitaines will remain a staple in your kit until you complete an Idris. These pieces alone, if augmented correctly can give a Luopan an additional -25% Damage Taken and 16 HP/tic Regen. While the Bagua Charm is not necessary as it's Geomancy +5 Effect does not stack with the Dunna's effect, the +6% Absorb Damage chance could be beneficial to some players. | With the Idris and Geomancy Mitaines +3, your Luopan will be at the -87.5% Damage Taken cap allowing you to put more pieces with Pet: Regen on, offsetting and possibly negating the perpetuation cost of the Luopan even with Ecliptic Attrition in effect. | |||||||||||||||||||||||||||||||||||||||||||||||||||||||||||||||||||||
Augments
|
Augments
|
Geomancy Effects and Mathematics
| Geomancy Effects | ||||||||||||||||||||||||||
|---|---|---|---|---|---|---|---|---|---|---|---|---|---|---|---|---|---|---|---|---|---|---|---|---|---|---|
| Effect | Parameter | Standard | Ecliptic Attrition (+25%) | Blaze of Glory (+50%) | BoG & EA (+75%) | Bolster | ||||||||||||||||||||
| 900 Skill | +5 | +6 | +7 | +10 | +5 | +6 | +7 | +10 | +5 | +6 | +7 | +10 | +5 | +6 | +7 | +10 | +5 | +6 | +7 | +10 | ||||||
| Stats | Attributes | 25 | 35 | 37 | 39 | 45 | 44 | 46 | 49 | 56 | 53 | 56 | 59 | 68 | 61 | 65 | 68 | 71 | 70 | 74 | 78 | 90 | ||||
| Regen | HP | 30 | 40 | 42 | 44 | 50 | 50 | 53 | 55 | 63 | 60 | 63 | 66 | 75 | 70 | 74 | 77 | 88 | 80 | 84 | 88 | 100 | ||||
| Refresh | MP | 6 | 11 | 12 | 13 | 16 | 14 | 15 | 16 | 20 | 17 | 18 | 20 | 24 | 19 | 21 | 23 | 28 | 22 | 24 | 26 | 32 | ||||
| Fury | Atk | 34.70% | 48.20% | 50.90% | 53.60% | 61.70% | 60.25% | 63.63% | 67.00% | 77.13% | 72.30% | 76.35% | 80.40% | 92.55% | 84.35% | 89.08% | 93.80% | 107.98% | 96.40% | 101.80% | 107.20% | 123.40% | ||||
| Barrier | Def | 39.80% | 62.80% | 50.90% | 53.60% | 61.70% | 78.50% | 84.25% | 90.00% | 107.25% | 94.20% | 101.10% | 108.00% | 128.70% | 109.90% | 117.95% | 126.00% | 150.15% | 125.60% | 134.80% | 144.00% | 171.60% | ||||
| Precision | Acc | 50 | 75 | 80 | 85 | 100 | 94 | 100 | 106 | 125 | 113 | 120 | 128 | 150 | 131 | 140 | 149 | 175 | 150 | 160 | 170 | 200 | ||||
| Voidance | Eva | 65 | 95 | 101 | 107 | 125 | 119 | 126 | 134 | 156 | 143 | 152 | 161 | 188 | 166 | 177 | 187 | 219 | 190 | 202 | 214 | 250 | ||||
| Acumen | M.Atk | 15 | 30 | 33 | 36 | 45 | 38 | 41 | 45 | 56 | 45 | 50 | 54 | 68 | 53 | 58 | 63 | 79 | 60 | 66 | 72 | 90 | ||||
| Fend | M.Def | 19.90% | 39.90% | 43.90% | 47.90% | 59.90% | 49.88% | 54.88% | 59.88% | 74.88% | 59.85% | 65.85% | 71.85% | 89.85% | 69.83% | 76.83% | 83.83% | 104.83% | 79.80% | 87.80% | 95.80% | 119.80% | ||||
| Focus | M.Acc | 50 | 75 | 80 | 85 | 100 | 94 | 100 | 106 | 125 | 113 | 120 | 128 | 150 | 131 | 140 | 149 | 175 | 150 | 160 | 170 | 200 | ||||
| Attunement | M.Eva | 65 | 95 | 101 | 107 | 125 | 119 | 126 | 134 | 156 | 143 | 152 | 161 | 188 | 166 | 177 | 187 | 219 | 190 | 202 | 214 | 250 | ||||
| Haste | Delay | 29.90% | 35.40% | 36.50% | 37.60% | 40.90% | 44.25% | 45.63% | 47.00% | 51.13% | 60 | 63 | 66 | 75 | 70 | 74 | 77 | 88 | 80 | 84 | 88 | 100 | ||||
| Poison | HP | 30 | 45 | 48 | 51 | 60 | 56 | 60 | 64 | 75 | 68 | 72 | 77 | 90 | 79 | 84 | 89 | 105 | 90 | 96 | 102 | 120 | ||||
| Slow | Delay | 14.90% | 17.40% | 17.90% | 18.40% | 19.90% | 21.75% | 22.38% | 23.00% | 24.88% | 26.10% | 26.85% | 27.60% | 29.85% | 30.45% | 31.33% | 32.20% | 34.83% | 34.80% | 35.80% | 36.80% | 39.80% | ||||
| Paralyze | 15.00% | 20.00% | 21.00% | 22.00% | 25.00% | 25.00% | 26.25% | 27.50% | 31.25% | 30.00% | 31.50% | 33.00% | 37.50% | 35.00% | 36.75% | 38.50% | 43.75% | 40.00% | 42.00% | 44.00% | 50.00% | |||||
| Gravity | Movement | 19.90% | 25.40% | 26.50% | 27.60% | 30.90% | 31.75% | 33.13% | 34.50% | 38.63% | 38.10% | 39.75% | 41.40% | 46.35% | 44.45% | 46.38% | 48.30% | 54.08% | 50.80% | 53.00% | 55.20% | 61.80% | ||||
| Wilt | Atk- | -25.00% | -48.00% | -52.60% | -57.20% | -71.00% | -60.00% | -66.75% | -71.50% | -88.75% | -72.00% | -78.90% | -85.80% | -106.500% | -84.00% | -92.05% | -100.10% | -124.25% | -96.00% | -105.20% | -114.40% | -142.00% | ||||
| Frailty | Def- | -14.80% | -28.30% | -31.00% | -33.70% | -41.80% | -35.38% | -38.75% | -42.13% | -52.25% | -42.45% | -46.50% | -50.55% | -62.70% | -49.53% | -54.25% | -58.98% | -73.15% | -56.60% | -62.00% | -67.40% | -83.60% | ||||
| Slip | Acc- | -65 | -95 | -101 | -107 | -125 | -119 | -126 | -134 | -156 | -143 | -152 | -161 | -188 | -166 | -177 | -187 | -219 | -190 | -202 | -214 | -250 | ||||
| Torpor | Eva- | -50 | -75 | -80 | -85 | -100 | -94 | -100 | -106 | -125 | -113 | -120 | -128 | -150 | -131 | -140 | -149 | -175 | -150 | -160 | -170 | -200 | ||||
| Fade | M.Atk- | -20 | -40 | -44 | -48 | -60 | -50 | -55 | -60 | -75 | -60 | -66 | -72 | -90 | -70 | -77 | -84 | -105 | -80 | -88 | -96 | -120 | ||||
| Malaise | M.Def- | -15 | -30 | -33 | -36 | -45 | -38 | -41 | -45 | -56 | -45 | -50 | -54 | -68 | -53 | -58 | -63 | -79 | -60 | -66 | -72 | -90 | ||||
| Vex | M.Acc- | -65 | -95 | -101 | -107 | -125 | -119 | -126 | -134 | -156 | -143 | -152 | -161 | -188 | -166 | -177 | -187 | -219 | -190 | -202 | -214 | -250 | ||||
| Languor | M.Eva- | -50 | -75 | -80 | -85 | -100 | -94 | -100 | -106 | -125 | -113 | -120 | -128 | -150 | -131 | -140 | -149 | -175 | -150 | -160 | -170 | -200 | ||||
| NOTE: The above +5, +6, +7, and +10 values are the TOTAL value of the item plus the maximum skill value, not the boost from the item alone. | ||||||||||||||||||||||||||
Indicolure and Geocolure Locations
| Geomancy Spell Locations | ||||||||||
|---|---|---|---|---|---|---|---|---|---|---|
| Indicolure Plate Locations | Geomantic Reservoir Locations | |||||||||
| Plate | Level | Acquisition | Location | Price (gil) | Spell | Level | Area | Position | ||
| Indi-Poison | 1 | Ishvad | Western Adoulin (I-5) Adoulin Waterfront Waypoint |
100 | Geo-Poison | 5 | East Ronfaure | (I-7) | ||
| Indi-Voidance | 4 | 372 | Geo-Voidance | 8 | Tahrongi Canyon | (H/I-7) | ||||
| Indi-Precision | 10 | 1,400 | Geo-Precision | 14 | Konschtat Highlands | (F/G-6) | ||||
| Indi-Regen | 15 | 2,335 | Geo-Regen | 19 | La Theine Plateau | (J/K-5) | ||||
| Indi-Attunement | 16 | 2,425 | Geo-Attunement | 20 | Qufim | (I-9) | ||||
| Indi-Focus | 22 | 6,692 | Geo-Focus | 26 | Gusgen Mines | (G-8) | ||||
| Indi-Barrier | 28 | 10,926 | Geo-Barrier | 32 | Batallia Downs | (D-7) | ||||
| Indi-Refresh | 30 | 21,000 | Geo-Refresh | 34 | La Theine Plateau | (H-10) | ||||
| Indi-CHR | 30 | 21,000 | Geo-CHR | 34 | Lower Delkfutt's Tower | (E-8) | ||||
| Indi-MND | 33 | 23,940 | Geo-MND | 37 | Rolanberry Fields | (J-10) | ||||
| Indi-Fury | 34 | 25,270 | Geo-Fury | 38 | Sauromugue Champaign | (K-6) | ||||
| Indi-INT | 36 | 30,912 | Geo-INT | 40 | Beaucedine Glacier | (H-9) | ||||
| Indi-AGI | 39 | 32,640 | Geo-AGI | 43 | Castle Oztroja | (H-8) Map 6 | ||||
| Indi-Fend | 40 | 34,000 | Geo-Fend | 44 | Davoi | (J-11) | ||||
| Indi-VIT | 42 | 43,740 | Geo-VIT | 46 | Garlaige Citadel | (H-9) | ||||
| Indi-DEX | 45 | 46,440 | Geo-DEX | 49 | Behemoth's Dominion | (E-8) | ||||
| Indi-Acumen | 46 | Eukalline | Western Adoulin (I-5) Adoulin Waterfront Waypoint |
52,080 | Geo-Acumen | 50 | Beaucedine Glacier | (J-6) | ||
| Indi-STR | 48 | 53,460 | Geo-STR | 52 | Crawlers' Nest | (F-6) | ||||
| Indi-Slow | 48 | 53,460 | Geo-Slow | 52 | Beadeaux | (K-8) | ||||
| Indi-Torpor | 52 | 61,875 | Geo-Torpor | 56 | Xarcabard | (F-7) | ||||
| Indi-Slip | 58 | 83,160 | Geo-Slip | 62 | The Eldieme Necropolis | (J-11) | ||||
| Indi-Languor | 64 | 94,185 | Geo-Languor | 68 | Bostaunieux Oubliette | (I-11) | ||||
| Indi-Paralysis | 68 | 103,040 | Geo-Paralysis | 72 | Fei'Yin | (H-5) | ||||
| Indi-Vex 3 5 | 70 | Eukalline Macrocosmic Orb |
Western Adoulin (I-5) Adoulin Waterfront Waypoint |
504,000 | Geo-Vex | 74 | Upper Delkfutt's Tower | (G-7) | ||
| Indi-Frailty 1 4 5 6 7 | 76 | 537,030 | Geo-Frailty | 80 | Ceizak Battlegrounds | (F-8) | ||||
| Indi-Wilt 5 | 82 | 576,300 | Geo-Wilt | 86 | Yahse Hunting Grounds | (K-7) | ||||
| Indi-Gravity 4 7 | 88 | 617,100 | Geo-Gravity | 92 | Foret de Hennetiel | (I-7) | ||||
| Indi-Malaise 1 2 | 88 | 617,100 | Geo-Malaise | 92 | Morimar Basalt Fields | (J-6) | ||||
| Indi-Haste 8 | 93 | 709,716 | Geo-Haste | 97 | Marjami Ravine | (J-6) | ||||
| Indi-Fade 2 5 | 94 | 703,800 | Geo-Fade | 98 | Morimar Basalt Fields | (G-8) | ||||
|
1 - Factory Rejects II | ||||||||||
Abilities, Traits, Merits, and Job Points
Abilities and Traits
|
| ||||||||||||||||||||||||||||||||||||||||||||||||||||||||||||||||||||||||||||||||||||||||||||
Merits
| Merits | ||||||||||||||||||||||||||||||||||||||||||||||||||||||||||||||||||||||||||||||||||||||||||||||||||||||||||||||||||||||||||||||||||||||||||||||||||||||||||||||||||||||||||||||||||||||||||||||||||||||||||||||||||||||||||||||||||||||||||||||||||||||||||||
|---|---|---|---|---|---|---|---|---|---|---|---|---|---|---|---|---|---|---|---|---|---|---|---|---|---|---|---|---|---|---|---|---|---|---|---|---|---|---|---|---|---|---|---|---|---|---|---|---|---|---|---|---|---|---|---|---|---|---|---|---|---|---|---|---|---|---|---|---|---|---|---|---|---|---|---|---|---|---|---|---|---|---|---|---|---|---|---|---|---|---|---|---|---|---|---|---|---|---|---|---|---|---|---|---|---|---|---|---|---|---|---|---|---|---|---|---|---|---|---|---|---|---|---|---|---|---|---|---|---|---|---|---|---|---|---|---|---|---|---|---|---|---|---|---|---|---|---|---|---|---|---|---|---|---|---|---|---|---|---|---|---|---|---|---|---|---|---|---|---|---|---|---|---|---|---|---|---|---|---|---|---|---|---|---|---|---|---|---|---|---|---|---|---|---|---|---|---|---|---|---|---|---|---|---|---|---|---|---|---|---|---|---|---|---|---|---|---|---|---|---|---|---|---|---|---|---|---|---|---|---|---|---|---|---|---|---|---|---|---|---|---|---|---|---|---|---|---|---|---|---|---|---|
| ||||||||||||||||||||||||||||||||||||||||||||||||||||||||||||||||||||||||||||||||||||||||||||||||||||||||||||||||||||||||||||||||||||||||||||||||||||||||||||||||||||||||||||||||||||||||||||||||||||||||||||||||||||||||||||||||||||||||||||||||||||||||||||
Job Points
| ||||||||||||||||||||||||||||||||||||||||||||||||||||||||||||||||||||||||||||||||||||||||||||||||||||||||||||||||||||||||||||||||||||||||||||||||||||||||||||||||||||||||||||||||||||||||||||||||||||||||||||||||||||||||||||||||||||||||||||||||||||||||||||
| Job Gift Total Bonuses | |||
|---|---|---|---|
| Capacity Point Bonus | +320% | ||
| New Spells | Fire V, Blizzard V, Aero V, Stone V, Thunder V, Water V Aspir III Fira III, Blizzara III, Aera III, Stonera III, Thundara III, Watera III | ||
| Magic Damage Bonus | 13 | ||
| Magic Attack Bonus | +42 | Geomancy Skill | +36 |
| Magic Accuracy Bonus | +50 | Handbell Skill | +36 |
| Magic Defense Bonus | +56 | Elemental Magic Skill | +36 |
| Magic Evasion Bonus | +36 | Dark Magic Skill | +36 |
Subjob Selection
|
| ||||
|
| ||||
| The following two subjobs are niche in the implementation. While they are strong options for soloing, allowing the Geomancer to get into the fray, many groups may look down upon them being used without either a strong argument to support their use or an agreement between the Geomancer and the party. The idea is that to provide a Geomancer with the Attack and Accuracy needed to perform well under the circumstance, there is a trade off on the longevity of the Luopan and the Geomancer themself. | |||||
|
| ||||
Food Selection
|
| ||||
|
|
JSE Armor
Geomancy Attire Set
- Mandatory +3: File:Geomancy Tunic +3 icon.png Geomancy Tunic +3, File:Geo. Mitaines +3 icon.png Geomancy Mitaines +3
Optional +3:
- Note: All upgrade items assume maximum upgrade amounts needed.
| Item | Base Item | Upgrade Materials | Result |
|---|---|---|---|
| File:Geo. Galero +3 description.png |
Quest: Wescolina Commission |
File:Atramenterrane icon.png Atramenterrane |
|
|
|
File:Geo. Galero +2 icon.png Geomancy Galero +2 | ||
|
|
File:Geo. Galero +3 icon.png Geomancy Galero +3 | ||
| |||
| File:Geomancy Tunic +3 description.png |
Quest: Wescolina Commission |
File:Lavarion icon.png Lavarion |
File:Geomancy Tunic icon.png Geomancy Tunic |
|
|
File:Geomancy Tunic +2 icon.png Geomancy Tunic +2 | ||
|
|
File:Geomancy Tunic +3 icon.png Geomancy Tunic +3 | ||
| NOTE: | |||
| File:Geo. Mitaines +3 description.png |
Quest: The Bloodline of Zacariah |
File:Geomancy Mitaines icon.png Geomancy Mitaines | |
|
|
File:Geo. Mitaines +2 icon.png Geomancy Mitaines +2 | ||
|
|
File:Geo. Mitaines +3 icon.png Geomancy Mitaines +3 | ||
| |||
| File:Geomancy Pants +3 description.png |
Quest: The Communion |
File:Geomancy Pants icon.png Geomancy Pants | |
|
|
File:Geomancy Pants +2 icon.png Geomancy Pants +2 | ||
|
|
File:Geomancy Pants +3 icon.png Geomancy Pants +3 | ||
| |||
| File:Geo. Sandals +3 description.png |
Quest: Wescolina Commission |
File:Cyclone Cotton icon.png Cyclone Cotton |
File:Geomancy Sandals icon.png Geomancy Sandals |
|
|
File:Geo. Sandals +2 icon.png Geomancy Sandals +2 | ||
|
|
File:Geo. Sandals +3 icon.png Geomancy Sandals +3 | ||
| |||
Bagua Attire Set
- Mandatory +3:
 Bagua Pants +3,
  Bagua Sandals +3
Optional +3:
- Note: All upgrade items assume maximum upgrade amounts needed.
| Item | Base Item | Upgrade Materials | Result |
|---|---|---|---|
| File:Bagua Galero +3 description.png |
Quest: Wescolina Commission |
|
|
|
|
|||
|
|
|||
| |||
| File:Bagua Tunic +3 description.png |
Quest: Wescolina Commission |
|
File:Bagua Tunic icon.png Bagua Tunic |
|
|
|||
|
|
|||
| |||
| File:Bagua Mitaines +3 description.png |
Quest: Wescolina Commission |
|
File:Bagua Mitaines icon.png Bagua Mitaines |
|
|
|||
|
|
|||
| |||
| File:Bagua Pants +3 description.png |
Quest: Wescolina Commission |
|
File:Bagua Pants icon.png Bagua Pants |
|
|
|||
|
|
|||
| |||
| File:Bagua Sandals +3 description.png |
Quest: Wescolina Commission |
|
File:Bagua Sandals icon.png Bagua Sandals |
|
|
|||
|
|
|||
| |||
Azimuth Attire Set
- Mandatory +3: File:Azimuth Hood +3 icon.png Azimuth Hood +3, File:Azimuth Gaiters +3 icon.png Azimuth Gaiters +3
Optional +3: File:Azimuth Coat +3 icon.png Azimuth Coat +3, File:Azimuth Gloves +3 icon.png Azimuth Gloves +3, File:Azimuth Tights +3 icon.png Azimuth Tights +3
- Note: All upgrade items assume maximum upgrade amounts needed.
| Item | Base Item | Upgrade Materials | Result |
|---|---|---|---|
| File:Azimuth Hood +3 description.png |
|
File:Azimuth Hood icon.png Azimuth Hood | |
|
|
|||
|
|
|||
| |||
| File:Azimuth Coat +3 description.png |
Quest: Treasures of the Earth |
File:Azimuth Coat icon.png Azimuth Coat | |
|
|
|||
|
|
|||
| |||
| File:Azimuth Gloves +3 description.png |
|
File:Azimuth Gloves icon.png Azimuth Gloves | |
|
|
|||
|
|
|||
| |||
| File:Azimuth Tights +3 description.png |
|
File:Azimuth Tights icon.png Azimuth Tights | |
|
|
|||
|
|
|||
| |||
| File:Azimuth Gaiters +3 description.png |
|
File:Azimuth Gaiters icon.png Azimuth Gaiters | |
|
|
|||
|
|
|||
| |||
Nantosuelta's Capes
| Augments | Purpose/Uses | Notes |
|---|---|---|
|
|
|
|
|
|
|
|
|
|
|
|
|
|
|
|
| The following are situational and should be acquired last. | ||
|
|
|
|
|
|
|
|
|
|
|
|
Gear Sets
While the sets below aren't considered to be the "Best in Slot", they are benchmarks to either build sets which fit your playstyle or group requirements. They all follow the chart below to allow progression through the sets, but equipment can be rearranged based on content you have access to and equipment you have for other jobs.
| Equipment Tiers | ||
|---|---|---|
| Low Tier | 0 JP | Delve, Sinister Reign, Quest Rewards, Ambuscade, HTBF |
| Mid Tier | 500 JP | Omen, Dynamis [D] Entries, Sortie A-D, Odyssey V0 Fights |
| High Tier | 1200 JP | Omen Bosses, Dynamis [D] Wave 1 Clear, Odyssey V15 Fights |
| Top Tier | 2100 JP | Dynamis [D] Wave 3 Clear, Sortie E-H, Odyssey V20 Fights |
| Pinnacle | ML 10 | NOT Best in Slot! Makes things damn near stupid easy with the right skill. |
Indicolure Sets
|
|
|
| ||||||||||||||||||||||||||||||||||||||||||||||||||||||||||||||||||||||||||||||||||||||||||||
| The beginner set is real easy to acquire, being assembled from quested pieces, Domian Invasion, and Reives. The Stikini Rings are reasonably priced and easy to acquire as there is a constant need for them and will serve you for a long time. | With Geomancy and Handbell skill are capped and merited, this set up will give you the required 900 combined skill as well at Geomancy +5 allowing you to participate in all content. | Both setups use the minimum pieces to bring you to the required skill, including the 20 skill lost for using the Bagua Charm +2 over the Incanter's Torque. You gain -21% DT and +2% in casting Geomancy spells for 0 MP from the two pieces of Azimuth Attire being upgraded to it's +2 variants. | |||||||||||||||||||||||||||||||||||||||||||||||||||||||||||||||||||||||||||||||||||||||||||||
Alternates
Augments
|
Alternates
Augments
| ||||||||||||||||||||||||||||||||||||||||||||||||||||||||||||||||||||||||||||||||||||||||||||||
|
|
||||||||||||||||||||||||||||||||||||||||||||||||||||||||||||||||||||||||||||||||||||||||||||||
| While you do lose some time due to trading out the augmented Gada for an Idris, the gains you make for having Geomancy +10 is extremely beneficial and sought after by all groups. It is a time consuming task to build an Idris, but is rewarding once you complete it. | |||||||||||||||||||||||||||||||||||||||||||||||||||||||||||||||||||||||||||||||||||||||||||||||
Augments
|
Augments
|
||||||||||||||||||||||||||||||||||||||||||||||||||||||||||||||||||||||||||||||||||||||||||||||
| Example Casting Sets | |||||||||||||||||||||||||||||||||||||||||||||||||||||||||||||||||||||||||||||||||||||||||||||||
|---|---|---|---|---|---|---|---|---|---|---|---|---|---|---|---|---|---|---|---|---|---|---|---|---|---|---|---|---|---|---|---|---|---|---|---|---|---|---|---|---|---|---|---|---|---|---|---|---|---|---|---|---|---|---|---|---|---|---|---|---|---|---|---|---|---|---|---|---|---|---|---|---|---|---|---|---|---|---|---|---|---|---|---|---|---|---|---|---|---|---|---|---|---|---|---|
|
|
| |||||||||||||||||||||||||||||||||||||||||||||||||||||||||||||||||||||||||||||||||||||||||||||


Geocolure Sets
The following gear sets are not intended to serve as the gear you use while casting a Geocolure spell, those sets closely follow the Indicolosure sets listed above. These sets are the idle sets after you finish casting and are not either casting elemental, enfeebling, or healing magic.
| Example Idle Sets | |||||||||||||||||||||||||||||||||||||||||||||||||||||||||||||||||||||||||||||||||||||||||||||||
|---|---|---|---|---|---|---|---|---|---|---|---|---|---|---|---|---|---|---|---|---|---|---|---|---|---|---|---|---|---|---|---|---|---|---|---|---|---|---|---|---|---|---|---|---|---|---|---|---|---|---|---|---|---|---|---|---|---|---|---|---|---|---|---|---|---|---|---|---|---|---|---|---|---|---|---|---|---|---|---|---|---|---|---|---|---|---|---|---|---|---|---|---|---|---|---|
|
|
| |||||||||||||||||||||||||||||||||||||||||||||||||||||||||||||||||||||||||||||||||||||||||||||
| Your basic Geocolure Idle set, this base set does not assume what gear was previously obtained but looks at what can be easily acquired by soloing with trusts. Any empty space should be filled with Pet Damage Taken or Pet Physical Damage Taken reductions, Pet Regen, then the Geomancer's Damage Taken and Physical Damage Taken. As a new Geomancer, you will not be expected to be in the fray as you are still developing your skills and building your gear. | While it is possible to get Telchine Attire Set early compared to some other gear, getting the augments of Pet: -4% Damage Taken and Pet: +3 Regen may be hard to come by. Prioritizing the damage taken on the Nantosuelta's Cape until you can get the -4% Damage Taken for each Telchine Attire piece. If you are able to get those augments, then this set will max both Pet Damage Taken and Pet Regen, allowing for the Luopan to remain for the full 10 minutes unless the damage taken is too much for the Luopan to recover itself. The use of Ecliptic Attrition will burden this set without the use of either Dematerialize or Life Cycle.
While the Bagua Galero +2 has +500 Luopan HP, the Luopan only gains this HP if the Galero is being worn sacrificing the possible -4% Damage Taken and +3 Regen from the Telchine Cap. |
While there is a slow shift between Pet Damage Taken to Pet Regen, the beginning focus to build additional Damage Taken reduction for the Geomancer themselves allowing them to stand in the heat of battle to provide their party with Indicolure buffs. The blend between the two offer a higher degree of survival for both the Geomancer and Luopan. | |||||||||||||||||||||||||||||||||||||||||||||||||||||||||||||||||||||||||||||||||||||||||||||
Alternatives
Augments
|
Alternatives
Augments
| ||||||||||||||||||||||||||||||||||||||||||||||||||||||||||||||||||||||||||||||||||||||||||||||
|
|
|
| ||||||||||||||||||||||||||||||||||||||||||||||||||||||||||||||||||||||||||||||||||||||||||||
| Having an Idris with the Geomancy Mitaines +3 caps the Luopan's Damage Taken reduction to -87.5% while the Geomancer receives -30% PDT. The Bagua Charm +2 offers 10% Damage Absorption by the Luopan aiding in its longevity through the course of a battle. Augment the cape with either Defense, Evasion, or Magic Evasion as you see fit after the Pet: +15 Regen. | |||||||||||||||||||||||||||||||||||||||||||||||||||||||||||||||||||||||||||||||||||||||||||||||
Alternatives
Augments
|
Alternatives
Augments
|
||||||||||||||||||||||||||||||||||||||||||||||||||||||||||||||||||||||||||||||||||||||||||||||


Nuking Sets
- "GEO goes Boom!"
- ~ Akabrena, Fight against Kei, 2021
With a B+ rating in Elemental Magic and bonuses from the Cardinal Chant trait, Geomancers have the ability to put up some comparative damage numbers with nukes. Geomancer gains 62 Magic Attack Bonus, 42 from job gifts and from job points. While it has no native Magic Attack Bonus from traits such as Black Mage and Red Mage do, it gains an additional 15 Magic Attack Bonus from Indi-Acumen. Magic Damage is a factor of several to include Magic Attack Bonus and Intelligence, which Magic Accuracy influencing resist rates. Spells are also affected by the 95% hit rate just like physical attacks.
|
|
| |||||||||||||||||||||||||||||||||||||||||||||||||||||||||||||||||||||
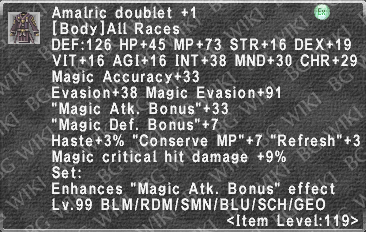
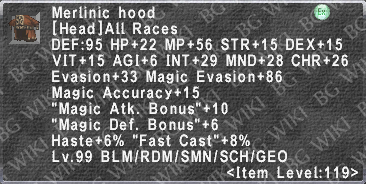
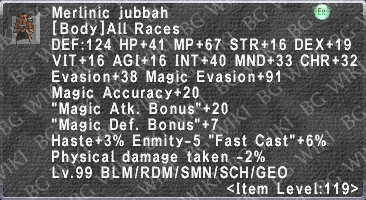
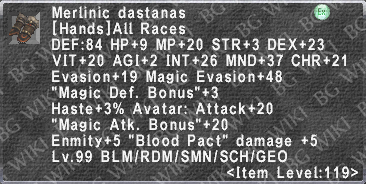
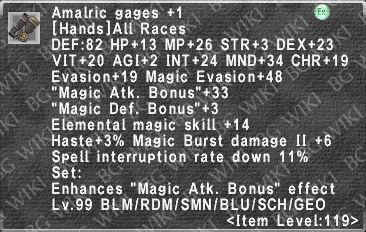
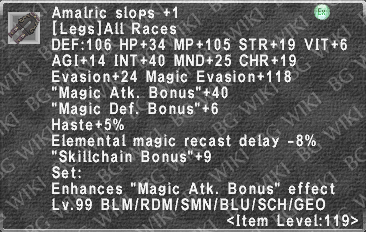
| Most of the beginner nuking gear can be found between Ambuscade, Domain Invasion, or previously released content. If you are unable to find anything with Magic Attack Bonus or Magic Accuracy, equip pieces which gives you additional INT. The more INT you have compared to your target, the more damage your spells end up doing. | All Merlinic Pieces should have +10 INT, +30 Magic Attack Bonus, and +30 Magic Accuracy on them. While Magic Damage seems beneficial to have, it may not offset the loss in Magic Attack Bonus on a piece. Compared to Amalric Attire +1, the Merlinic Attire Set has significantly less Magic Attack Bonus but a significant amount of Magic Accuracy and Intelligence which will effect a spell's hit and resist rate. | The Amalric Doublet +1 and Amalric Gages +1 will add an additional 13 Magic Attack Bonus at the cost of 5 Magic Accuracy and 6 Intelligence. Overall a Geomancer will see better damage numbers with this combination compared to using all Bagua Attire +3. As for the accessories, a Geomancer will want to mix Magic Attack Bonus and Magic Accuracy in order to maximize between the damage dealt and a spell being resisted. There are several pieces that trade a few points of one for the other and can be traded out based on what your group needs.
| |||||||||||||||||||||||||||||||||||||||||||||||||||||||||||||||||||||
Alternatives
Augments
|
Alternatives
Augments
|
Alternatives
Augments
| |||||||||||||||||||||||||||||||||||||||||||||||||||||||||||||||||||||
|
|
| |||||||||||||||||||||||||||||||||||||||||||||||||||||||||||||||||||||
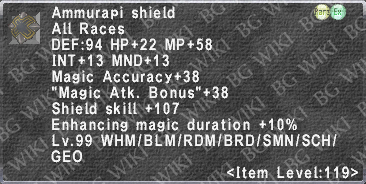
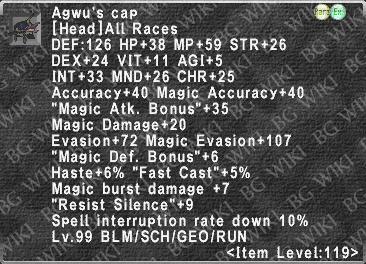
| When it comes to using a Daybreak or an Idris, the choice if a Geomancer has both is left up to the Geomancer. The afterglow on an Idris can give up to an additional 50 Magic Attack Bonus, but unless fully augmented, will lose 15 Magic Attack Bonus compared to a Daybreak. Either weapon paired with an Ammurapi Shield has the best Magic Attack Bonus, Magic Damage, and Magic Accuracy for not only Geomancer, but several jobs. | |||||||||||||||||||||||||||||||||||||||||||||||||||||||||||||||||||||||
| Alternatives
Augments
|
Alternatives
Augments
|
Alternatives
Augments
| |||||||||||||||||||||||||||||||||||||||||||||||||||||||||||||||||||||


Magic Burst Sets
While not having any native Magic Burst Bonuses a Geomancer is able to equip several piece with Magic Burst Bonus, charging it's nukes when closing Skillchains. The longer the skillchain the more damage the magic burst does, so take advantage of using higher damage nukes to close the bursts at later steps. Through the use of a geomancer's -ra spells as well as haste and fast cast sets, they can double burst bypassing the Nuke Wall for full damage on two nukes. As a magic burst set is commonly one of the last sets you will be competing, this guide assumes the geomancer is between between the mid and high tiers nuking sets and selects gear and accessories from those above listed sets.
|
|
| |||||||||||||||||||||||||||||||||||||||||||||||||||||||||||||||||||||
| Borrowing on the simple principle that if you are building a basic Magic Burst Damage set, you are going to begin deviating from your Nuking Set, benefiting from +9 Magic Burst Bonus and +5% Fast Cast. The Ghastly Tathlum provides more damage over the Memoria Sachet if you are unable to acquire the Pemphredo Tathlum early in your Geomancer Career. | |||||||||||||||||||||||||||||||||||||||||||||||||||||||||||||||||||||||
Alternatives
| |||||||||||||||||||||||||||||||||||||||||||||||||||||||||||||||||||||||
|
|
| |||||||||||||||||||||||||||||||||||||||||||||||||||||||||||||||||||||
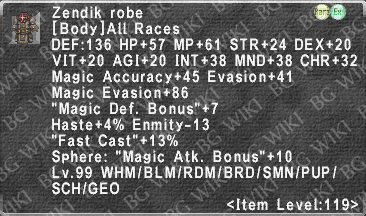
| This Burst set will give you a significant amount of damage by capping out the Magic Burst Damage bonus allowing for some significant numbers to be seen. The set boost a significant amount of Magic Accuracy allowing you to stack the Magic Attack Bonus and Intelligence in other slots for more damage. While the Ea Attire Set does suffer from lower stats all around, the set does boost some of the best Magic Evasion for geomancers. | Though the set has Magic Burst Bonus I of +44, there is no set-up which wouldn't cause a significant loss Magic Burst Damage trying to replace a piece to achieve the cap of +40 MBB I. | ||||||||||||||||||||||||||||||||||||||||||||||||||||||||||||||||||||||
Alternatives
Augments
|
|||||||||||||||||||||||||||||||||||||||||||||||||||||||||||||||||||||||


Enfeebling Sets
|
|
|
| ||||||||||||||||||||||||||||||||||||||||||||||||||||||||||||||||||||||||||||||||||||||||||||
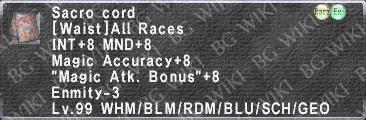
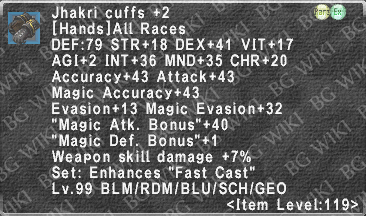
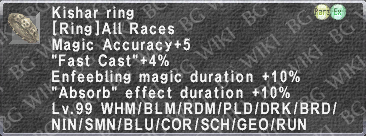
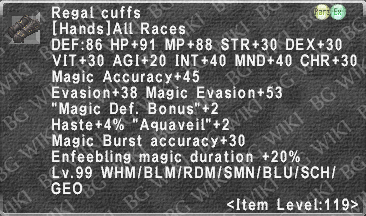
| As you slowly progress in skill and gear, there is a shift for stacking more Magic Accuracy as well as slowly adding Enfeebling Magic Skill gear. While an additional point in Enfeebling Magic is roughly equivalent to one Magic Accuracy, the Enfeebling Magic Skill also adds to the potency of some enfeebling spells. Continue to prioritize Enfeebling Magic Skill, Magic Accuracy, and then Mind. Trade out the Jkahri Attire for Merlinic Attire as you are able to acquire augments which make the piece better than the previous set. | The Geomancy Attire +2 is easy to acquire after a couple of Omen runs needing only 40 Paragon Geomancer Cards. Equipping all five pieces will grant the geomancer an additional 60 Magic Accuracy allowing for accessories have additional Enfeebling Magic Skill and Mind oppose to Magic Accuracy. The three piece bonus will begin to see the turning of using either Jharki or Merlinic in turn for Geomancy Attire +2 especially on pieces of the former sets which have the least amount of Magic Accuracy. | While it is no Red Mage, with either sub Red Mage, Scholar, or Black Mage, Geomancer has access to debuffs. The Geomancy Attire Set +3 offers the best Magic Accuracy for Geomancer. Coupled with the Regal Cuffs and Earring, Geomancer will be able to extend effects for spells like Sleep or the Elemental Debuffs. Depending on the debuff you will either want Mind or Intelligence on the cape for casting. | |||||||||||||||||||||||||||||||||||||||||||||||||||||||||||||||||||||||||||||||||||||||||||||
Augments
|
Augments
|
Augments
| |||||||||||||||||||||||||||||||||||||||||||||||||||||||||||||||||||||||||||||||||||||||||||||

Misc. Gear Sets
|
|||||||||||||||||||||||||
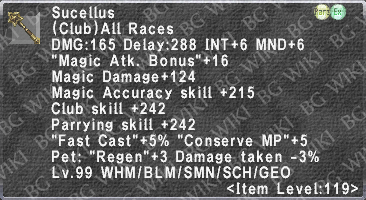
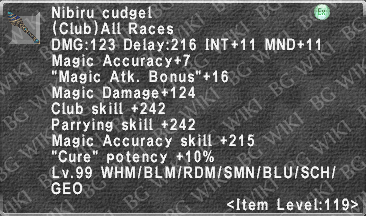
| Geomancers have no native healing skill, acquiring it from their subjob. A healing set should cap Cure Potency followed by Healing Skill and lastly Mind. A Nibiru Cudgel performs a better than an unaugmented Gada, but augmenting a Gada with an additional 10 Mind and 7% Cure potency will outperform a Nibiru Cudgel. If all all other constants remain the except the weapon, the progression would be Nibiru Cudgel to either an augmented Gada or Daybreak. | |||||||||||||||||||||||||
Augments
|


Melee and Weapon Skill Gear Sets
| Example Melee Sets - More Coming Soon! | ||||||||||||||||||||||||||||||||||||||||||||||||
|---|---|---|---|---|---|---|---|---|---|---|---|---|---|---|---|---|---|---|---|---|---|---|---|---|---|---|---|---|---|---|---|---|---|---|---|---|---|---|---|---|---|---|---|---|---|---|---|---|
|
|
|||||||||||||||||||||||||||||||||||||||||||||||
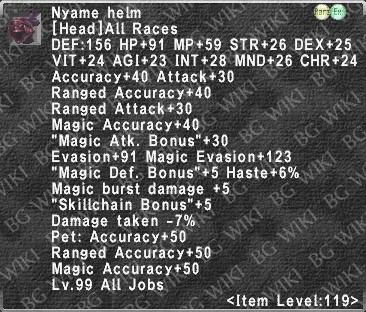
| Nyame Path B... We all know you're going to do it, so just go ahead and do it anyway... | For all your GEO/DNC and GEO/NIN needs... | |||||||||||||||||||||||||||||||||||||||||||||||
| * Next you're going to ask me for WS sets as well, right... | * Now... You got me wondering... | |||||||||||||||||||||||||||||||||||||||||||||||
| Example Weapon Skill Sets - Coming Soon! | ||||||||||||||||||||||||||||||||||||||||||||||||


_icon.png)
_description.png)
_description.png)
Acknowledgements and Dedication
Thanks to all those along the way who helped out especially the information put out by UsedtobeRDM and their Geomancer's Thought Bubble, Brixy and his Bubble Trouble guide and, Ruaumoko and his Final Fantasy XI: Geomancer Guide video as well as the countless threads between BG-Wiki, FFXIAH, and Reddit.
Thanks to the guys over in the LS taking the chance in letting me come in and pick up Geomancer. I appreciate the hours we spent grinding out content watching me bust bubbles before getting it right and then helping me gear it up so we can watch it go boom! This is for you guys! Another shout out to Articchaos for helping out with the testing and Braams for ideas that gave this guide a breath of life rather than making it seem like an advance calculus class.
Updates
Current Version:
- V24.3.1 - Minor updates
Older Versions:
- V22.12.3 - Subjob and Food Sections formatting overhaul
- V22.12.2 - Melee Gear Sets refined, to include Ambuscade Cape
- V22.12.1 - Revamp of Indicolure Gear Sets
- V22.11.1 - Melee Gear Set Added
- V22.11.1 - Added Empyrean Armor +3
- V22.9.1 - Added Empyrean Armor +2
- V22.6.1 - Reformatted Artifact and Relic Armor sets, added Empyrean Armor
- V21.6.1 - Updated Nuking Sets
- V21.3.5 - Ambuscade Capes Updated
- V21.3.4 - Magic Burst Sets created
- V21.3.3 - Indicolure and Geocolure Acquistion 2.0
- V21.3.2 - Subjob and Food Selection Added
- V21.3.1 - Geomancy Spells Acquisition and Effects Added
- V21.2.2 - Enfeebling Sets Added
- V21.2.1 - Page Created