Community Black Mage Guide
|
|
"Ohoho!"
|
General Information
Roles
Black Mages are essential for end-game Sortie and extremely helpful for endgame content including Dynamis Divergence and Odyssey Sheol Gaol. BLM is primarily a damage dealer but can save parties in a pinch with a combination of its potent Breakga/Sleepga and Mana Wall to serve as a damage sponge while the rest of the party gets things under control. As a Black Mage, successfully magic bursting (and having the party aligned and able to create the requisite skillchains) is critically important to your damage output. Black mage is one of the most powerful damage dealers in the game when used correctly in the right situations with proper planning and execution.
Black Mage should be expected to:
- Deal elemental damage
- Switching between bursting or free nuking sets.
- Know the elemental weaknesses of the foe.
- Magic Burst, whether solo or coordinating with a group.
- Understanding the gist of magic accuracy and magic damage, detailed in a section below.
- Support
- Elemental Debuffs - especially Burn for increasing magic damage for the party - and Impact are powerful
- Competent curing is very helpful in a pinch, especially if you're running SCH or WHM as a subjob.
- Crowd control with Sleepga, Bind, Stun, and Breakga.
- /SCH provides the potential for Dispelga as well.
- Be frontline or backline
- BLM can and should WS to SC in various situations.
- BLM has Mana Wall, and can use it well.
- BLM has the ability to generate TP without meleeing via Occult Acumen
- BLM has access to AoE WSs and Spells.
- It is often not appropriate to run just because you have hate.
Abilities and Traits
| Job Traits | |
|---|---|
| Lvl. | Name |
| 10, 30, 50, 70, 84, 91 | Magic Attack Bonus |
| 15, 30, 45, 60, 75 | Clear Mind |
| 20, 76, 86 | Conserve MP |
| 45, 58, 71, 84, 97 | Mag. Burst Bonus |
| 50, 60, 70, 80, 90 | Elemental Celerity |
| 85, 95 | Occult Acumen |


Mana Wall
Mana Wall should not be ignored - when geared properly, you can be a tanking god for 5 minutes and potentially allow your party to recover or get away safe. The way this ability works, damage against you is halved (after you master, it's reduced by 70%!) and then converted to MP damage instead; this is obviously stupidly powerful with your MP pool but it stacks with other Mana Wall gear and your -Damage Taken gear as well.
Mana Wall caps at 95% potency, meaning that incoming damage is reduced by 95% THEN converted to MP damage.
- By default Mana Wall's ability provides 50% reduction
- When mastered with JP, additional 20% reduction
- Taranus's Cape from Ambuscade provides another 10% reduction
- Wicce Sabots +3 provides 25% reduction
- Archmage's Staff Path C provides 20% reduction - as you can see, the SU4 staff suffices as the additional Mana Wall reduction from the SU5 staff is wasted on the cap.
When using Mana Wall, you should ensure your set also has capped -Damage Taken as those stats are accounted for before the conversion to MP damage is calculated. It's also nice to use gear such as Archmage's Staff and Ethereal Earring to convert damage to MP, effectively lowering the "damage" even more so.
As an example borrowed from a very helpful reddit post:
The Sortie G Boss, Triboulex, uses an ultimate move called "Setting the Stage" that deals 30,000 damage divided among all party members in range. With only the BLM in range, that 30,000 damage is reduced:
- -DT reduces that 30k damage by ~50% to 15,000
- Mana Wall gear reduces that 15k damage by 95% to 750 damage
- That 750 damage is converted to -750 MP
- If using Archmage's Staff and Ethereal Earring, you receive 7% of that damage back, returning 52 MP so effectively from the entire attack you only took 698 MP damage.
There are big negatives that prevent Mana Wall to be used to fully tank - namely you shed enmity extremely quickly with Mana Wall active, and it's especially tough to hold enemies unless you're super tanking (meaning no other party members are attacking enemies and pulling enmity). It's recommended to use specific +enmity sets for spells like Stun to pull away NMs and keep your party safe in times of emergency.
Status effects can also still affect you, and Mana Wall is a buff that CAN be dispelled.
Merits
| Merit Points | |||
|---|---|---|---|
| Name | Description | Level | Notes |
| Group 1 | |||
| Elemental Seal Recast | Shorten recast time by 20 seconds. | 0/5 | Situationally useful if you're using your Mythic Staff to boost damage, but not worth the loss in potency from the other Merit options. |
| Fire Magic Potency | Increase the potency of Fire spells by 2. | X/5 | Recommend 5/5 if you're the BLM for Sortie, as you'll be using Fire spells on a majority of the targets there. |
| Ice Magic Potency | Increase the potency of Ice spells by 2. | X/5 | Recommend 5/5 either Ice or Earth merits (or a combination of both) if you're the BLM for Sortie, as you'll be using these spells to combat the Sortie B and F bosses. |
| Wind Magic Potency | Increase the potency of Wind spells by 2. | X/5 | |
| Earth Magic Potency | Increase the potency of Earth spells by 2. | X/5 | Recommend 5/5 either Ice or Earth merits (or a combination of both) if you're the BLM for Sortie, as you'll be using these spells to combat the Sortie B and F bosses. |
| Lightning Magic Potency | Increase the potency of Lightning spells by 2. | X/5 | |
| Water Magic Potency | Increase the potency of Water spells by 2. | X/5 | |
| Group 2 | |||
| Ancient Magic Magic Attack Bonus | Increase Ancient Magic magic attack damage by 3. | 0/5 | |
| Ancient Magic Magic Burst Damage | Increase Ancient Magic magic burst damage by 3%. | 0/5 | |
| Elemental Magic Magic Accuracy | Increase Elemental Magic Accuracy by 5. | 0/5 | You could make a case for this situationally, but it should be very niche. |
| Elemental Magic Debuff Duration | Increase Elemental Magic debuff duration by 12 seconds. | 5/5 | See next note. |
| Elemental Magic Debuff Effect | Increase Elemental Magic debuff potency by 2 and damage over time by 1. | 5/5 | Increasing the chance of Burn sending you to the next INT tier makes this the most important merit category. |
| Aspir Absorption Amount | Increase the amount of MP absorbed by Aspir by 4%. | 0/5 | It be nice, but not at the cost of increasing your Burn potency and duration. |
Support Jobs
|
Understanding Magic
Magic Accuracy
- Outside of minor edits please use the discussion page for the guide to discuss any major edits or corrections.
When it comes to being a BLM it is more an exercise in what you know about the foe and what you know about mechanics than just going boom-booms. It is easier for a DD to flub their way through than for you to. So let's go over the rigamarole so that we might all suck less.
While melee combat skills provide a corresponding boost to accuracy and attack at a rate of less than 1:1. Magic skill+ are a 1:1 skill to accuracy gain, but provide no extra attack.
To determine your magic accuracy total. Add up your elemental skill, magic accuracy skill, magic accuracy+, merits, gifts, food, buffs, debuffs, and then factor in dINT. Which is in the section below.
- A Mastered BLM with a Master Level of 0 will sit at 512 before any equipment or dINT.
- Adding an Mpaca's Staff R0 would add 40 Magic Accuracy and 255 skill for 807.
Your hit rate is simply your magic accuracy against the magic evasion of your foe. Magical hit rate caps at 95%. Meaning 5% of the time a player will otherwise be resisted.
- If your magic hit rate is 50% or more then magic accuracy +1 is equivalent to hit rate +1%.
- If your magic hit rate is less than 50% then magic accuracy +1 is equivalent to hit rate +0.5%.
- Any Magic accuracy that raises you to the 50% mark then returns to being 1:1.
- E.g. Your hit rate is 40% and you gain 40 magic accuracy. Your hit rate becomes 70%.
- Any Magic accuracy that raises you to the 50% mark then returns to being 1:1.
However, the magic evasion of the foe is not actually simple. It is a factor of the foe's magic evasion stat, dINT, the resistance tier of the corresponding element of the foe, and level correction where applicable.
- Thus, there is no single magic accuracy number to cap hit rate for a foe as there would be a physical accuracy.}}
INT also plays a role in the magic accuracy of all nukes and INT based enfeebles. The magic accuracy bonus of INT depends on two things:
- dINT, the difference of INT between caster and foe.
- Magic Hit Rate, which we covered, but factors in here.
| dINT and Magic Accuracy+ | |||||||
|---|---|---|---|---|---|---|---|
| dINT | <-70 | -70 ~ -31 | -30 ~ -11 | -10 ~ +10 | +11 ~ +30 | +31 ~ +70 | >+70 |
| MAcc+ Per INT | 0 | 0.25 | 0.5 | 1 | 0.5 | 0.25 | 0 |
| Range Total | +0 | +10 | +10 | +20 | +10 | +10 | +0 |
| MAcc+ Total | +0 | +0-10 | +10-20 | +20-40 | +40-50 | +50-60 | +60 |
So, INT has a sweet spot from -10 to +10, but also a no-no spot, and that spot is 70+. Which by that age you don't expect much anyway.
- Ba-dum-tss
Once your dINT has been calculated to Magic Accuracy it affects your magic hit rate in the same way:
Example: Your magic hit rate is 65%.
- While dINT is +30, and you gain 19 INT.
- Your hit rate is now 69%. Nice.
- While dINT is -38 and you gain 19 INT.
- Your hit rate is now 72%.
Example: Your magic hit rate is 45%.
- While dINT is -50 and you gain 20 INT.
- Your hit rate is now 47%.
- While dINT is -10 and you gain 20 INT.
- Your hit rate is now 60%.
WAR (E.g. Crawler, Funguar, Wivre, Bat, etc) is the most common job in the game, and it is the second lowest tier of native INT, where PLD (E.g. Beetle, Crab, etc) is the lowest ranking of INT.
- Expect the INT of an opponent to be higher or lower based on their job.
Foe INT is tiered as (highest to lowest):
- BLM
- SMN
- DRK, COR, SCH, THF, RDM
- BRD, BLU, NIN, RUN
- BST, PUP, RNG, SAM, WHM
- DNC, DRG, WAR
- MNK, PLD
| Random Examples of Endgame INT | |||||||
|---|---|---|---|---|---|---|---|
| Foe | Level | Job | INT | ||||
| Ongo V0 | 134 | RUN? | 345 | ||||
| Ongo V20 | 134 | RUN? | 425 | ||||
| Apex Soldier Lugcrawler | 136 | WAR | 261 | ||||
| Apex Blazer Elytra | 136 | PLD | 241 | ||||
| Apex Helm Elytra | 138 | PLD | 251 | ||||
| Apex Soldier Lugcrawler | 136 | WAR | 261 | ||||
| Apex Rumble Lugcrawler | 138 | WAR | 284 | ||||
| Apex Soldier Lugcrawler | 136 | WAR | 261 | ||||
| Locus Wivre | 136 | WAR | 256 | ||||
| Apex Water Ele | 133 | BLM | 354 | ||||
| Locus Colibri | 135 | RDM | 340 | ||||
| Triboulex | 145 | DRK/BLM | 504 | ||||
| Apex Archaic Cogs | 147 | RNG | 390 | ||||
| Mireu | 150 | WAR? | 474 | ||||
The Resistance of a foe is the final and most important piece of the puzzle. Not only for magic accuracy, but for damage. Though we will only cover the accuracy portion of that here, just like with INT.
| Low Resistance Resistance Ranks High Resistance | ||||||||||||||
|---|---|---|---|---|---|---|---|---|---|---|---|---|---|---|
| 150% | 130% | 115% | 100% | 85% | 70% | 60% | 50% | 40% | 30% | 25% | 20% | 15% | 10% | 5% |
First, let me just summarize the resist page here in terms of accuracy. Foes have individual resistances to all elements, and these values are tiered out in the table above. A neutral resistance tier is 100%, where as weakness would be anything above that, and vice versa for resitance.
Any foe with a resistance status of 50% forces a resist. Resists will be either a 1/2 (-50%), 1/4 (-75%), or 1/8th (-87.5%). So a Skeleton for example, has a ![]() dark resistance tier of 50%. This means any dark based spell which lands is not going to either be full damage or full duration.
dark resistance tier of 50%. This means any dark based spell which lands is not going to either be full damage or full duration.
Now, there are two things players can do to change the resistance, Rayke and Skillchains.
- Rayke reduces the resistance tier to the corresponding element by a tier per rune.
- E.g. a foe has a 30% resistance tier to an element, and three runes of that element are Rayked. The reistance tier is now 60% for the duration of Rayke, which is a big deal.
- Skillchains will temporarily lower the resistance tier of the damage of the skillchain by one tier for the window of it.
- Magic bursting also adds a speculated +100 accuracy to a spell.
- See the Resist#Modifying Resistance Rank for more explanation on how a SC damage type is determined.
- It is the lowest resistance tier, but this can change depending on other steps involved.
This becomes very applicable with NMs, which can tend to have different resistance values from ordinary foes of the same family or even other NMs. For example, no tier 3 Odyssey NM in Sheol Gaol has a weakness above 30% unless their aura is on which then changes it to 100% iirc. With their neutral elements being 25% and their opposing element at the lowest 5% tier.
This means if you fight a foe like Ongo then the magic defense down from Vidohunir will not land outside of when the aura is on. Same for defense down effect from a weapon skill against Xevioso. In fact to finish that thought, they will only really stand a chance to land against Mboze unless Rayke is used.
Further, as a BLM you can uniquely bypass some of the hindrance of Resist tiers while under Subtle Sorcery. It will bypass the forced resists from a tier 50% or less, but will not solve the next component of elemental resistance tiers.
Second, the remaining factor to resistance to account for is the magic accuracy requirements imposed by resistance tiers. Which is not actually on the wiki currently. Not because I am some rumored gate keeper, but because neither I nor anyone else have gotten around to it, and it involves deciphering Japanese testing through google Translate. Not the easiest for sure, but what is clear is that as resistance tiers go lower and resistance to an element goes higher. It imposes a greater magic accuracy requirement to cap hit rate.
- Here is the testing I am referring to, and one which corroborates the INT magic accuracy/Ongo testing from Lutes blog cited at the bottom references on both of those pages.
- The red text is confirmed, and the black is theorized.
- This testing lines up with the observable effective magic accuracy required for Ongo, 1,365.
- Since you are magic bursting, yes, the resistance rank changes from 30% to 40% for the burst window, and changes the accuracy required to 1,222 before counting the +100 from bursting.
- Accuracy requirements jump steeply below the 30% tier. The table lacks it for Ongo, but I can make an educated guess based on the data there. Which means you need an effective magic accuracy of ~1,710 to land Burn on Ongo, given it's 25% tier to fire.
Now the testing doesn't go past the 20% tier, but it doesn't need to with how steep it gets. So when it comes to nuking, SC dmg, or enfeebling any iLvl foe around the lowest tiers, forget about it unless you throw the kitchen sink at the foe. Which generally isn't practical.
Fortunately, there is a lower magic accuracy requirement for the higher resistance tiers. Let's tie this together with a practical example using a level 139 Apex Draugar. Which has a resistance tiers of ![]() 130%,
130%, ![]() 70%, and
70%, and ![]() 50%. Spells would cap hit rate at the following:
50%. Spells would cap hit rate at the following:
 1,102
1,102 1,204
1,204 1,295
1,295
- Due to the forced resist, if you casted sleep. Then you will either not land the spell or it will land for a reduced time.
What is cool about all of this this is that outside of anything that lowers your macc or boosts the magic evasion of the foe, you can better figure out or fine tune a set to cap hit rate.
| Estimated Magic Accuracy Requirements | ||||||||||
|---|---|---|---|---|---|---|---|---|---|---|
| Level | 30% | 40% | 50% | 60% | 70% | 85% | 100% | 115% | 130% | 150% |
| 124 | 1,005 | 892 | 831 | 814 | 778 | 756 | 755 | 753 | 736 | 729 |
| 125 | 1,041 | 925 | 862 | 843 | 828 | 784 | 779 | 775 | 758 | 750 |
| 126 | 1,078 | 958 | 893 | 872 | 852 | 812 | 804 | 797 | 780 | 772 |
| 127 | 1,114 | 991 | 924 | 901 | 863 | 840 | 829 | 818 | 801 | 793 |
| 128 | 1,154 | 1,024 | 955 | 930 | 891 | 868 | 854 | 840 | 823 | 814 |
| 129 | 1,185 | 1,057 | 986 | 959 | 920 | 896 | 879 | 862 | 844 | 835 |
| 130 | 1,219 | 1,090 | 1,017 | 988 | 948 | 924 | 904 | 883 | 869 | 856 |
| 131 | 1,257 | 1,123 | 1,048 | 1,017 | 977 | 952 | 928 | 905 | 889 | 878 |
| 132 | 1,293 | 1,156 | 1,079 | 1,046 | 1,005 | 980 | 953 | 926 | 911 | 899 |
| 133 | 1,329 | 1,189 | 1,110 | 1,075 | 1,034 | 1,008 | 978 | 948 | 933 | 920 |
| 134 | 1,365 | 1,222 | 1,141 | 1,104 | 1,060 | 1,036 | 1,003 | 970 | 955 | 941 |
| 135 | 1,402 | 1,255 | 1,172 | 1,133 | 1,089 | 1,064 | 1,028 | 991 | 977 | 962 |
| 136 | 1,438 | 1,288 | 1,203 | 1,162 | 1,118 | 1,092 | 1,052 | 1,013 | 999 | 984 |
| 137 | 1,475 | 1,321 | 1,234 | 1,191 | 1,147 | 1,120 | 1,077 | 1,034 | 1,021 | 1,005 |
| 138 | 1,510 | 1,354 | 1,265 | 1,220 | 1,175 | 1,148 | 1,102 | 1,056 | 1,043 | 1,026 |
| 139 | 1,547 | 1,387 | 1,296 | 1,249 | 1,204 | 1,176 | 1,127 | 1,078 | 1,065 | 1,047 |
| 140 | 1,582 | 1,420 | 1,327 | 1,278 | 1,232 | 1,204 | 1,152 | 1,099 | 1,087 | 1,068 |
| 141 | 1,618 | 1,453 | 1,358 | 1,307 | 1,260 | 1,232 | 1,176 | 1,121 | 1,109 | 1,090 |
| 142 | 1,654 | 1,486 | 1,389 | 1,336 | 1,288 | 1,260 | 1,201 | 1,142 | 1,131 | 1,111 |
| 143 | 1,690 | 1,519 | 1,420 | 1,365 | 1,317 | 1,288 | 1,226 | 1,164 | 1,153 | 1,132 |
| 144 | 1,726 | 1,552 | 1,451 | 1,394 | 1,345 | 1,316 | 1,251 | 1,186 | 1,175 | 1,153 |
| 145 | 1,762 | 1,585 | 1,482 | 1,423 | 1,374 | 1,344 | 1,276 | 1,207 | 1,197 | 1,174 |
| 146 | 1,798 | 1,618 | 1,513 | 1,452 | 1,402 | 1,372 | 1,300 | 1,229 | 1,219 | 1,196 |
| 147 | 1,834 | 1,651 | 1,544 | 1,481 | 1,430 | 1,400 | 1,325 | 1,250 | 1,241 | 1,217 |
| 148 | 1,870 | 1,684 | 1,575 | 1,510 | 1,459 | 1,428 | 1,350 | 1,272 | 1,263 | 1,238 |
| 149 | 1,906 | 1,717 | 1,606 | 1,539 | 1,487 | 1,456 | 1,375 | 1,294 | 1,285 | 1,259 |
| 150 | 1,943 | 1,750 | 1,637 | 1,568 | 1,515 | 1,484 | 1,400 | 1,315 | 1,307 | 1,280 |
- Values in the table are based off of: [1].
- Resistance Ranks are linear per level while the various ranks for that level are exponential increases as resistance increases.
- Final table data is credited to Thefoxdanger.
- There was not enough data collected for the 20% and 25% ranks, but it is safe to say the curve gets steep.
- Keep in mind, the table is estimated values built off of another table of very well estimated values. Expect that you may possibly be off by ~10 magic accuracy at a given time.
Practical implications of the write up:
- Gear enfeebles like sleep or break with a focus in magic accuracy and enfeebling skill.
- Magic Hit Rate caps at 95%, and a miss is simply a reist, which has various values.
- The value of macc from INT depends on dINT. It can be as large as +1 or as low as +0.
- Resistance Ranks aka Resistance Tiers dramatically impact magic accuracy.
Corresponding pages:
Affinity
Affinity, also referred to as "Elemental Magic Attack Bonus", adds damage in a separate multiplier term from all standard forms of Magic Attack Bonus.
The base value for this term when no Affinity gear is present = 1.0.
For each stat on gear with Elemental affinity listed:
- Damage affinity +1: Affinity = 1.1
- Damage affinity +2: Affinity = 1.15
- Damage affinity +3: Affinity = 1.20
- Damage affinity +4: Affinity = 1.25
- Damage affinity +5: Affinity = 1.30
- Damage affinity +6: Affinity = 1.35
Elemental Magic Attack Bonus from gear is additive with this term. This statistic is found on gear such as Pixie Hairpin +1 and Weatherspoon Ring.
- For example, equipping Pixie Hairpin +1 (28%) and Archon Ring (5%) would make this term = 1.33 for damage.
- Orpheus's Sash uniquely grants this stat for all elements. See its page for details.
Equipment usable by BLM that provides Elemental Magic Attack Bonus include:
- Ngqoqwanb provides 15% elemental affinity.
- Ossa Grip provides 2% elemental affinity when the user has Ice Spikes active.
- Marin Staff and Marin Staff +1 provide 10% and 11%
 elemental affinity, respectively.
 - Kaikias' Cape provides 4% elemental affinity.
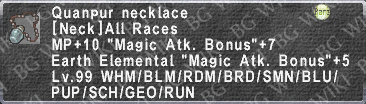
- Quanpur Necklace provides 5%
 elemental affinity.
 - Weatherspoon Ring and Weatherspoon Ring +1 provide 10% and 11%
 elemental affinity, respectively.
 - Pixie Hairpin +1 provides 28% elemental affinity.
- Archon Ring provides 5% elemental affinity.
- Orpheus's Sash provides a range of 1-15% elemental affinity bonus for all elements dependent on distance from the target, for a maximum of 15%
 elemental affinity if the target is within 1.93' from the player.
Reminder that spells like Comet, Impact, Aspir, and Death are darkness elemental magic and ARE enhanced by equipment that boosts darkness elemental affinity!
Cumulative Magic aka -ja Spells
Cumulative Magic, usually just called "-ja" spells, are a very important part of playing BLM and raising the entire party's damage for a specific element.
Each time a cumulative magic spell is cast, a hidden debuff is placed on the monster which makes the monster take 5% additional damage from damage of that element for 60 seconds. Each successive cast of the same cumulative magic spell on the same target (from any player) will increase this elemental damage boost by an additional 5% of base damage; however, the window is not extended and will end 60 seconds after the first cumulative magic spell hit the monster even if another matching spell is cast, unless you use Empyrean legs (Extends the window all the way to 110 seconds duration if using Wicce Chausses +3).
- The total damage boost caps at 25%.
For example, assuming an initial casting damage of 1000 for Firaja, casting Firaja repeatedly within 60 seconds will result in damage of 1000, 1050, 1100, etc. Other fire damage, such as Fire IV or Wildfire, will also receive this damage boost (+5%, +10%, etc.) while in effect.
- Firaja makes the target take 5% additional damage per cast
- Blizzaja makes the target take 5% additional damage per cast
- Thundaja makes the target take 5% additional
 damage per cast
 - Aeroja makes the target take 5% additional damage per cast
- Stoneja makes the target take 5% additional damage per cast
- Waterja makes the target take 5% additional
 damage per cast
 - Comet makes the target take 5% additional damage per cast
Technically speaking, you only need to have your Empyrean legs equipped on the first cast of Cumulative Magic, but since the Wicce Chausses +3 are BIS for both Free Nuking and Magic Bursting, you don't have to worry much about swapping.
Death
Death is a spell with very different mechanics that are worth knowing more about.
Death has a chance to instantly KO the enemy, though this does not affect NMs. If your enemy is not killed, the damage formula is:
- (Current MP×3 + Magic Damage)×(MAB/MDB)×(Affinity)×(Day/Weather)
- Note that the Magic Damage in the above formula is capped to 32
You need at least 1 MP to cast Death, and using it expends all of your current MP, even if you have Manafont or Manawell up.
Part of the trick to using Death properly is to build specific sets that ensure that you have the highest possible MP prior to use - this is why you'll see BLMs in specific Idle sets that maximize MP, and cast Death using a specific Precast set that retains as much MP as possible so that your MP isn't cut before you even cast the spell.
Meteor
Unfortunately, the coolest and most visually spectacular spell that Square-Enix added to the game has very limited use in endgame.
Meteor is unique in the fact that it's a non-elemental elemental magic spell - meaning that it uses your elemental magic skill to calculate its damage, but it is typeless and cannot be resisted. It does require you to use Elemental Seal before casting, so consider it on a 10-minute cooldown. It also takes eons to cast - consider building a precast set for this spell that crams in as much Quick Magic gear as you can.
- Unlike other nukes, elemental magic skill contributes directly to Meteor base damage, and the damage is independent of the enemy's INT.
- Meteor's base damage can be approximated as: (1+MAB/100)*floor(INT + Elemental Magic Skill/6)*3.5
Meteor is however worth discussing for at least one specific use-case: the Sortie D & H bosses.
If the fight with either of the Sortie D & H bosses go awry, they use a special ability called Vivisection - this is a full dispel on the party that also removes the NM's elemental weakness, meaning that all of your other spells do pitiful damage... with the exception of Meteor, as it's typeless damage! If the boss is low health and gets off Vivisection, consider using Meteor - it could save the run or at least dramatically save time for the fight to recover!
Impact
Impact is a very special spell that can only be cast if you're wearing one of two particular and difficult to acquire pieces of equipment - these cloaks must remain equipped both for the precast and midcast periods:
- Twilight Cloak
- Crepuscular Cloak - 119 version so has much higher MACC and stats
Impact is an ALL STATS DOWN debuff on the target that deals dark damage and lowers an enemy's Strength, Dexterity, Vitality, Agility, Intelligence, Mind, and Charisma.
- Each of the target's base stats is reduced by 20% of the value at the time of cast.
- Stat values are snapshotted on cast, so Impact will have the highest potency if applied before other reductions such as Elemental Debuffs, namely Burn.
As you might imagine, this can be incredibly potent and can dramatically raise damage against certain NMs, in particular the Sortie C and G bosses.
Impact's maximum duration is 3 minutes, though if resisted the duration will be cut drastically. Since this is an elemental magic spell, a combination of elemental magic skill and magic accuracy is highly encouraged to ensure that this great spell lasts as long as possible against foes with high magic evasion. It's worth coordinating with a Red Mage in your party to have them cast Frazzle III on the enemy first before using Impact.
Equipment
Weapons
File:Eminent Staff icon.png Eminent Staff
|
An iLvl 117 staff acquired from any Sparks Vendor for 7,000 Sparks.
|
| File:Homestead Staff icon.png Homestead Staff366px link= | An iLvl 119 staff acquired from Craggy Bluff in Eastern Adoulin for 3,000 Bayld.
|
| File:Kaladanda icon.png Kaladanda366px link= | The JSE weapon crafted by Oboro in Port Jeuno. Though easily acquired, probably not worth the gil investment as better staffs are easier to get with less effort.
|

|
The final stage of the Ambuscade Staff, certainly not worth the investment for just BLM, but if you already have it, it will serve your BLM until you get a better weapon.
|
File:Lathi icon.png Lathi
|
Either drops from Yilan, a Geas Fete NM in Escha - Ru'Aun, or purchased using Domain Invasion point from Zurim in Norg, this staff will be a staple in your collection for a long time especially when starting out. Easily acquired after two or three days worth of bonuses from Domain Invasion runs.
|

|
Drops from Kouryu, a fairly difficult Geas Fete NM in Escha - Ru'Aun. Unrealistic that you'll get this while gearing up BLM as a first job, but if you have it it's excellent until beaten out by a Keraunos with ideal augs.
|
| File:Keraunos icon.png Keraunos366px link= {{#replace:INT +17, MAB/MAcc +20|,| }} |
Alluvion Skirmish weapon - you can pick this up upon doing Intermediate ROEs too and it's a very worthy upgrade. Augments are random from the Adoulin Inventor's Coalition so your luck on getting nice augments may vary.
|

|
Obtained from Geas Fete NM Bashmu from Reisenjima, or in exchange for 800 Domain Invasion Points. Not as good as Marin Staff +1 in most situations, unless you get really really lucky on augments from Oseem. You can also try to augment this during Dark Matter Augment campaigns, where theoretically you can break the normal stat limits and get a very powerful staff if you're lucky.
Possible Oseem Augments include: Magic Attack Bonus +1~30, Magic Accuracy +1~30, INT +1~20, Magic Burst Bonus +1~10%
|
File:Marin Staff +1 icon.png Marin Staff +1 {{#replace:R15) INT/MND +10, Acc/MAcc +40, MAB +40|,| }} |
Best pre-REMA staff and pretty easily achievable thru Unity Accolade NM Vedrfolnir. Shoot for this to have a capable weapon for endgame BLM.
|
File:Contemplator +1 icon.png Contemplator +1
|
While this staff is tied to Tumult Curator, it is still one of the best staves to have in your arsenal especially when you are getting heavily resisted. It's Magic Accuracy is one of the highest in the game, especially for Enfeebling Magic, all wrapped up in a nice little package.
Rank 15 Augments: Magic Accuracy +70, Enfeebling Magic Skill +20, MND +10
|
 {{#replace:R30) Acc/MAcc +15, MAB +30, INT +5|,| }} |
You're able to purchase the R0, unaugmented staff after clearing the Odyssey Sheol Gaol NM, Arebati. After killing Arebati V5+, you'll acquire RP that you can then spend to augment this staff. Even after acquiring REMA weapons, Mpaca's Staff can be a great balanced weapon for bursting Death.
|
{{#replace:R15) DMG: +10, "Myrkr" potency +10%, MP +30|,| }} |
Empyrean Staff. Best staff for Death and a great all-around option for Fast Cast/faster recast on spells.
|
{{#replace:R15) DMG: +8, "Shattersoul: damage +10%, Acc/MAcc +30|,| }} |
Aeonic Staff. Fantastic staff for Occult Acumen sets and for weaponskills that favor TP bonus such as Cataclysm and Earth Crusher. Useful for strats that utilize Death as you can cast in Occult Acumen set, use Myrkr to recover MP, and do it all over again.
|
{{#replace:R15) DMG: +26, Vidohunir: Damage +15%, Acc/MAcc +30|,| }} |
Mythic Staff. Second best damage option and competitive while you have AM2 active. Best magic accuracy in the game. Vidohunir can do big damage against darkness weak enemies, so it's absolutely worth building a set for when using Laev.
|
| File:Opashoro (Level 119 III) icon.png Opashoro366px link= | Prime Staff. Absolutely the apex for damage output for the mage jobs that can use it. Aftermath is more easily achievable and consistent than with Laevateinn and greatly improves damage output. |
Sadly, Claustrum is not even worthy of an honorable mention - the Relic Staff isn't even remotely competitive for casting magic, though it is a very high accuracy melee option if you are looking for an extremely niche melee build. Probably not worth the investment for any real purpose in-game.
Ambuscade Capes Recommended Priority List
WIP:
- Free Nuking/Magic Bursting: INT +30, Macc/Mdmg +20, Magic Attack Bonus +10
- Fast Cast/MP/Idle: MP +80, Macc/Mdmg +20, Fast Cast +10%, Damage Taken -5%
- Occult Acumen: INT +30, Macc/Mdmg +20, Store TP +10
- Vidohunir/WS: INT +30, Macc/Mdmg +20, Weapon Skill Damage +10%
- Melee TP: DEX +20, Acc +30, Atk +20, Store TP +10
- Midcast Death: MP +80, Macc/Mdmg +20, Magic Attack Bonus +10
- Stun/Enmity: Macc +30, Mdmg +20, Enmity +10
Recommended JSE Armor Priority List
Artifact Armor
| Spaekona's Attire Set | ||
|---|---|---|
| Item | Upgrade? | Notes |
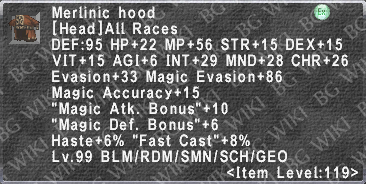
| File:Spae. Petasos +3 icon.png Spae. Petasos +3366px link= |
No | |
| File:Spaekona's Coat +3 icon.png Spaekona's Coat +3366px link= |
Yes #1 | Absolutely essential for Free Nuking and MP management: Converts 2% of elemental magic damage dealt to MP. Get ASAP |
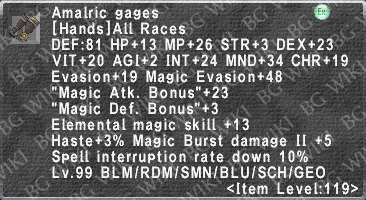
| File:Spae. Gloves +3 icon.png Spae. Gloves +3366px link= |
Yes #3 | Nice piece for both its magic accuracy and elemental magic skill, used for Elemental Debuffs like Burn and for Impact |
| File:Spae. Tonban +3 icon.png Spae. Tonban +3366px link= |
Yes #2 | Drain/Aspir set |
| File:Spae. Sabots +3 icon.png Spae. Sabots +3366px link= |
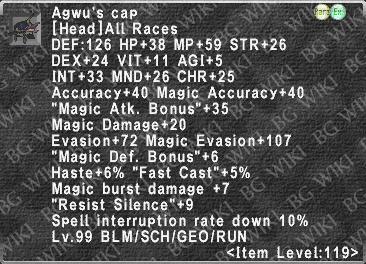
Maybe | Magic Bursting until replaced by Empyrean boots and/or Agwu |
Relic Armor
| Archmage's Attire Set | ||
|---|---|---|
| Item | Upgrade? | Notes |
Arch. Petasos +3 
|
No | Cannot find a reason to pick this up - even if you do use Ancient Magic, the benefits from its MB bonus are outweighed by gear that provides Magic Burst Bonus II. Save your time and gil. |
Arch. Coat +3366px link= |
Yes #3 | Great for extending Manafont duration and for Idle Refresh until you get the Empyrean +3 chest or Shamash Robe |
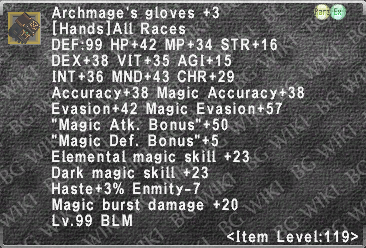
Arch. Gloves +3 
|
Maybe | Magic Bursting piece before you get Empyrean +3 and/or Agwu's |
Arch. Tonban +3366px link= |
Yes #1 | Get ASAP to enhance Burn and Elemental Debuff spells. Also a decent Magic Bursting piece until you get Empyrean +3 |
Arch. Sabots +3366px link= |
Yes #2 | Get ASAP to enhance Burn and Elemental Debuff spells. Also used for Aspir spells |
Empyrean Armor
| Wicce Attire Set | ||
|---|---|---|
| Item | Upgrade? | Notes |
| File:Wicce Petasos +3 icon.png Wicce Petasos +3366px link= |
Yes #5 | Great for Free Nuking and for DT |
| File:Wicce Coat +3 icon.png Wicce Coat +3366px link= |
Yes #2 | Essential for Magic Bursting and Idle Refresh sets (debatable between this and Shamash) |
| File:Wicce Gloves +3 icon.png Wicce Gloves +3366px link= |
Yes #4 | Great for Free Nuking and for DT. Magic Critical Hit is a nice added bonus, but not as good as it sounds as a default "magic crit" only adds +10 Magic Attack Bonus when it procs, so this piece would make a 13% chance for an extra 23 MAB. |
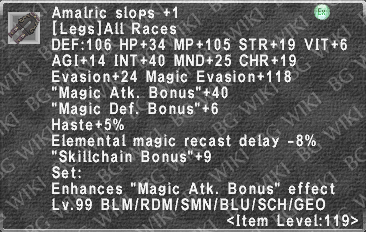
| File:Wicce Chausses +3 icon.png Wicce Chausses +3366px link= |
Yes #1 | Essential for Magic Bursting and for Cumulative Magic (-ja spells) |
| File:Wicce Sabots +3 icon.png Wicce Sabots +3366px link= |
Yes #3 | Essential for Mana Wall use and for DT. Great for Magic Bursting until you replace with high augment Agwu's. |
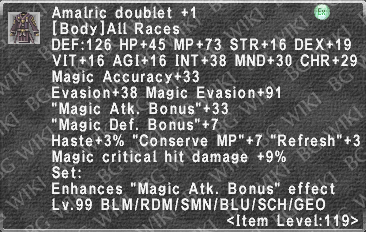
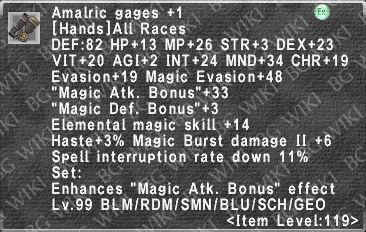
Note that ALL of the Empyrean Armor +3 is BIS for Free Nuking not only because of the stats on them but also because of the Empyrean Armor Proc wherein when Conserve MP is proc'd, extra damage is calculated based on double of the MP conserved.
Other Essential BLM Gear
Hachirin-no-Obi
Hachirin-no-Obi is absolutely essential and it's highly recommended to have your Gearswap LUA automatically equip it while nuking when the weather conditions are met. It's a tremendous damage boost and should be paired with Klimaform either you cast as /SCH or cast by a SCH in your party.
Weather Damage bonuses are as follows:
- +10% bonus for the element matching the day
- +10% bonus for the element matching single weather
- +20% when both single weather and Iridescence procs
- +20% bonus for the element matching single weather and day
- +30% when both single weather and Iridescence procs
- +25% bonus for the element matching double weather
- +35% when both double weather and Iridescence procs
- +35% bonus for the element matching double weather and day
- +45% when both double weather and Iridescence procs
- The element that is weak to the day/weather can suffer the same percentage as above as a penalty
- e.g. can get -10% during weather.
- e.g.
Grips

|
Drops from Warder of Courage, Geas Fete NM - great Magic Attack Bonus
|

|
Drops from Yakshi, a Geas Fete NM - useful if you're chasing maximum Conserve MP for Empyrean Armor Procs.
|

|
Best Magic Accuracy and comes with bonus DT. Definitely a contender if you don't have REMA and MACC is an issue.
|

|
Drops from Glassy Gorger in Omen - probably the best overall grip. |
Gearsets
WIP to create new sets and recommendations for subjobs, Ambuscade capes, and other sets. Edits welcome but should not be unilaterally deleted without replacements in place.
Precast Sets
Note: BLMs receive the Elemental Celerity trait, which provides 30% faster casting (38% when mastered) for specifically elemental magic. However, this does NOT grant faster recast after you're done casting this spell. If you'd like to take advantage of this, you can only have 42 Fast Cast in your Elemental Magic Precast set and fill in the other slots with -DT and Magic Evasion gear.


Midcast Sets
For all Free Nuking/Magic Bursting sets, the Wicce Earring +2 is BIS as long as it has 9 or higher INT in its augment. However, this isn't included in the below sets due to its extreme rarity. If you're lucky enough to get the drop and then the necessary augment, use the JSE+2 in your right ear and the Malignance Earring in your left ear.
Midcast Free Nuking Sets
|


Midcast Magic Bursting Sets
Magic Burst Damage and the Merit category for AM2 bonus caps at 40%. The Magic Burst Bonus trait, Job Point category, Gifts, and Magic Burst Bonus II are not subject to this cap.
| Starter Magic Bursting Sets | |||||||||||||||||||||||||||||||||||||||||||||||||||||||||||||||||||||||||||||||||||||||||||||||||||||
|


|
Midcast Other Sets
|


Idle Sets
|


Melee & Weaponskill Sets
|


Healing and Utility Sets
|


_icon.png)
_description.png)
_description.png)
_icon.png)
_description.png)
Tips and Tricks
Sortie
Black Mages are extremely valuable for Sortie endgame runs and on top of their usual role of Magic Bursting everything into smithereens, compiled below are a few tips for bringing the maximum utility to your team:
- Most endgame Sortie groups split up at the beginning to accomplish objectives and receive Shard Key Items to gain access to Sortie's bosses. In just about all normal Sortie magic runs, the BLM will be solely responsible for accomplishing the A objectives:
- After buffing, run south from the start, pop Mana Wall, and round up 6 Acuex enemies. If you have a good Mana Wall set, you should be able to tank them with ease and lose minimal MP.
- Cast Firaja, Firaga III, and other AOE spells to get the 6 Acuex enemies down to 20% or so HP.
- Do not kill any enemies with AOE spells; instead, swap to single target Fire magic and kill them one by one.
- You should spawn chests containing Ra'Kaznar Shard A and Ra'Kaznar Metal A, as well as a bonus blue chest that has a chance to drop an Old Case.
- If you are lucky enough to see the roaming NM Obdella, you'll easily be able to tank it in your Mana Wall set and Free Nuke it to death for another chest.
- After A objectives are done, many parties start the boss order with D. If so, keep going south and join the rest of the party at the D boss.
- For all bosses, it's wise to save your SCH a strategem and use Manifestation and cast Klimaform on the entire party. Since Klimaform's duration and potency are set, you're better off using it and allowing your SCH to have a better strat economy.
- Specific tips and tricks for each boss:
- D/H bosses change their elemental affinities, so you'll have to quickly cast the opposite element to proc the boss. However, if the boss uses Flaming Kick or Icy Grasp, you CAN and SHOULD land Burn on the boss to raise the rest of the party's damage. If you are unlucky enough to cause the boss to use Vivisection, you should Elemental Seal then Meteor to either finish off the boss or at least speed up the end of the fight.
- A/E bosses are pretty simple and you should just Burn and burst Fire or Earth spells (up to your party's preference)
- B/F bosses alternate between electric hands (use Earth magic) and wind hands (use Ice magic). Annoying if you lose stacks of your -ja magic when it alternates, just soldier through it.
- C/G bosses are susceptible to Impact if you have access to it, and it is extremely potent. Save Burn until after you land Impact as it'll overall lower more INT in that order. It's recommended to pop Elemental Seal if you have it up before using Impact on the G boss to ensure it lasts the maximum duration.