Dynamis - Windurst (D)
| ||||||||||||||||||||||||||||||||||||||||||||||||||||||||||||||||||||

Dynamis - Windurst [D]


Maps

|

|
Zone Information
| Divergence Statues | ||||||||||
|---|---|---|---|---|---|---|---|---|---|---|
| Zone | Icon & Eyes | Statue and Monsters | ||||||||
| File:Windurst-Flag.jpg Windurst |
File:Snowflake.png Blue | Reduced damage taken (-50%) from all melee damage types. | ||||||||
| File:Moon.png Green | Reduced damage taken (-33.3%) from | |||||||||
| File:Cherry Petal.png Red | Spawns higher level Yagudo NMs. These NMs will have access to Doom. Doom: | |||||||||
| File:Conquest.png All Zones |
Colorless | NOTE: Lacks any nameplate icon.
| ||||||||
- Zone initially loads out with only statues called Incarnation Idols and the mid-boss, Envincing Idol. Incarnation Idols spawn Yagudos when aggroed.
- All Yagudos are dual job and have access to 1 hr abilities from both jobs. BST mobs may use charm even if a pet is summoned.
- Fii Pexu the Eternal along with "Leader" and "Commander" Yagudos have access to their unique family move Doom which is inflicts a 10-count doom on the target.
- The mid-boss Envincing Idol is near the zone to Windurst Waters at (C-6).
- Grants 30 minutes of additional time once defeated along with the title: "Dynamis-Windurst [D] Trespasser".
 Black. I. Card start dropping instead of
  Rusted I. Card after the mid-boss is defeated.
- May drop Beastmen's Medals along with several Rusted I. Cards as personal drops.
- Personal drops will be gained only if a party members is gaining the win for the first time. It is possible to not receive any drops.
- After the Envincing Idol is defeated, all previously spawned statues and Yagudos that still remain in the zone will be removed and replaced with new statues which spawn upgraded Yagudo mobs called "Regiments".
- Fii Pexu the Eternal, a Yagudo NM will spawn near the Mog House entrance (bottom right of K-8) as well. Upon defeat, he will grant the title: "Dynamis-Windurst [D] Infiltrator" and an additional 30 minute time extension.
- May drop up to 3 Kindred's Medals along with several Black. I. Cards and Volte Armor set pieces.
- Personal drops will be gained based on if any party members are gaining the win for the first time.
- This may include Black. I. Cards and Kindred's Medals. Spoils vary in number. It is possible to not receive any drops.
- Fii Pexu the Eternal, a Yagudo NM will spawn near the Mog House entrance (bottom right of K-8) as well. Upon defeat, he will grant the title: "Dynamis-Windurst [D] Infiltrator" and an additional 30 minute time extension.
- After the Fii Pexu the Eternal is defeated, all previously spawned statues and Yagudos that still remain in the zone will be removed and replaced with "Volte" Hydra Corps mobs and Elemental "Circle" fetters.
- "Volte" Hydra Corps mobs only have 1 job and can use their respective 1 hour ability.
- "Volte" Ninja's 1 hr ability Mijin Gakure is only single target instead of AOE.
- Disjoined Tarutaru, a Hydra Corps Tarutaru Fomor NM will spawn near Heaven's Tower at H-7 as well. If he along with the other 3 Disjoined NM mobs from the other Dynamis-Divergence zones are defeated, the player will be granted the special title: "Judge, Jury and Executioner".
- May drop up to 3 Demon's Medals along with several Old Identification Cards.
- Personal drops will be gained based on if any party members are gaining the win for the first time.
- This may include Old Identification Cards and Demon's Medals. Spoils vary in number. It is possible to not receive any drops.
- "Volte" Hydra Corps mobs only have 1 job and can use their respective 1 hour ability.
Drops
- Headshards may be rarely obtained directly as spoils from any "Squadron" or "Leader" Yagudos before the mid-boss is killed.
- Drops correspond to a Yagudo's jobs.
- "E.g. Squadron Trickster (THF/DNC) drops THF-Headshard and DNC-Headshard"
- Drops correspond to a Yagudo's jobs.
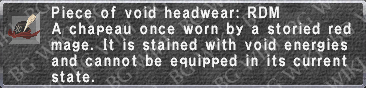
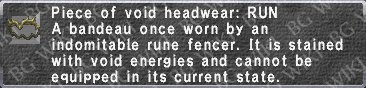
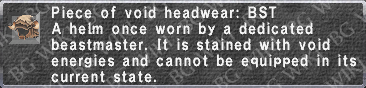
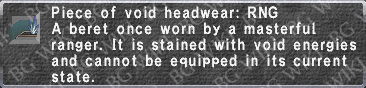
- Voidheads may be rarely obtained directly as spoils from any "Regiment" or "Commander" Yagudos after the mid-boss is killed.
- Drops correspond to a Yagudo's jobs
- "E.g. Regiment Combatant (MNK/PUP) drops MNK-Void Handwear & PUP-Void Handwear"
- Drops correspond to a Yagudo's jobs
- Any "Leader" or "Commander" Yagudos that spawn from Red eye based statues:
- These may potentially drop either Beastmen's Medals or Kindred's Medals which are dependent whether the zone's mid-boss is killed or not.
- They may also potentially pieces of the Volte armor set. Drop rate seems to be incredibly low.
- Note that individual spoils gained from either Envincing Idol or Fii Pexu the Eternal varies with the number of party members that have not killed either respective mob.
- Keep in mind that this only affects the number of potential drop slots and doesn't guarantee any drops. It's possible for nothing to drop.
- All mobs of wave 3 in including Aurix, "Volte" Hydra Corps Fomors, and Disjoined Tarutaru can drop Old Identification Cards and Demon's Medals. The Elemental "Circle" Fetters drop nothing.
NM Locations
File:Windurst-Flag.jpg
|
Red Eyed Statue Locations | |||||||
|---|---|---|---|---|---|---|---|---|
| Pre Mid-Boss | ||||||||
| WAR DRK BRD SAM |
House of the Hero |
MNK PUP RDM RUN |
Jeuno Consulate |
BLM GEO WHM SMN |
Toraimarai Canal |
THF DNC NIN BLU |
Mog House Bridge | |
| BST RNG |
Koru-Moru's Manor |
PLD DRG COR SCH |
Windurst Woods Bridge | |||||
| Post Mid-Boss | ||||||||
| WAR DRK |
Yoran Oran Bridge |
MNK PUP |
Heaven's Tower (NW) |
WHM SMN |
Heaven's Tower (NE) |
BLM GEO |
Heaven's Tower (South) | |
| RDM RUN |
Toraimarai Canal |
THF DNC |
Zonpa-Zippa Bridge |
PLD DRG |
Koru-Moru Bridge |
BST RNG |
Jeuno Consulate | |
| BRD SAM |
Before Auction House |
NIN BLU |
Windurst Woods Bridge |
COR SCH |
Mog House Bridge |
|||
Notorious Monsters
| Notorious Monsters | ||||
|---|---|---|---|---|
| Lv. | Name | Genus | Drops | Map |
| Aurix Special: Aggro statues with closed (Grey) eyes. |
Goblin |
Pre Mid-Boss: Post Mid-Boss: Post Wave 2 Boss: |
||
| 139 | Fii Pexu the Eternal THF· Zone Boss: Defeat Envincing Idol |
Yagudo |
Direct Drop Pool:
Personal Drop Pool: |
|
| 132 | Envincing Idol Mid-Boss |
Replica |
Direct Drop Pool: Personal Drop Pool: |
|
| 149 | Disjoined Tarutaru Disjoined Boss: Defeat Fii Pexu the Eternal |
Fomor |
Direct Drop Pool: Personal Drop Pool: |
|
| Disjoined Tarutaru ??? Special: Spawns from any elemental "circle" fetters in wave 3 |
Fomor |
Direct Drop Pool: Personal Drop Pool: |
||
| ||||


Adversaries
| Adversaries | ||||
|---|---|---|---|---|
| Lv. | Name | Genus | Drops | Spawns |
| 127-127 | Incarnation Icon |
Replica | ||
| - | Elemental Circle |
Unclassified | ||
| 127-127 | Squadron Hoplite WAR·DRK Before Envincing Idol |
Yagudo | ||
| 134-134 | Regiment Hoplite WAR·DRK After Envincing Idol |
Yagudo | ||
| 127-127 | Squadron Ascetic MNK·PUP Before Envincing Idol |
Yagudo | ||
| 134-134 | Regiment Ascetic MNK·PUP After Envincing Idol |
Yagudo | ||
| 127-127 | Squadron Ruffian THF·DNC Before Envincing Idol |
Yagudo | ||
| 134-134 | Regiment Ruffian THF·DNC After Envincing Idol |
Yagudo | ||
| 127-127 | Squadron Magian BLM·GEO Before Envincing Idol |
Yagudo | ||
| 134-134 | Regiment Magian BLM·GEO After Envincing Idol |
Yagudo | ||
| 127-127 | Squadron Prognosticator RDM·RUN Before Envincing Idol |
Yagudo | ||
| 134-134 | Regiment Prognosticator RDM·RUN After Envincing Idol |
Yagudo | ||
| 127-127 | Squadron Champion PLD·DRG Before Envincing Idol |
Yagudo | ||
| 134-134 | Regiment Champion PLD·DRG After Envincing Idol |
Yagudo | ||
| 127-127 | Squadron Empath BST·RNG Before Envincing Idol |
Yagudo | ||
| 134-134 | Regiment Empath BST·RNG After Envincing Idol |
Yagudo | ||
| 127-127 | Squadron Orisha WHM·SMN Before Envincing Idol |
Yagudo | ||
| 134-134 | Regiment Orisha WHM·SMN After Envincing Idol |
Yagudo | ||
| 127-127 | Squadron Minnesinger BRD·SAM Before Envincing Idol |
Yagudo | ||
| 134-134 | Regiment Minnesinger BRD·SAM After Envincing Idol |
Yagudo | ||
| 127-127 | Squadron Spy NIN·BLU Before Envincing Idol |
Yagudo | ||
| 134-134 | Regiment Spy NIN·BLU After Envincing Idol |
Yagudo | ||
| 127-127 | Squadron Privateer COR·SCH Before Envincing Idol |
Yagudo | ||
| 134-134 | Regiment Privateer COR·SCH After Envincing Idol |
Yagudo | ||
| 129-129 | Hoplite Leader WAR·DRK Before Envincing Idol |
Yagudo | ||
| 137-137 | Hoplite Commander WAR·DRK After Envincing Idol |
Yagudo | ||
| 129-129 | Ascetic Leader MNK·PUP Before Envincing Idol |
Yagudo | ||
| 137-137 | Ascetic Commander MNK·PUP After Envincing Idol |
Yagudo | ||
| 129-129 | Ruffian Leader THF·DNC Before Envincing Idol |
Yagudo | ||
| 137-137 | Ruffian Commander THF·DNC After Envincing Idol |
Yagudo | ||
| 129-129 | Magian Leader BLM·GEO Before Envincing Idol |
Yagudo | ||
| 137-137 | Magian Commander BLM·GEO After Envincing Idol |
Yagudo | ||
| 129-129 | Prognosticator Leader RDM·RUN Before Envincing Idol |
Yagudo | ||
| 137-137 | Prognosticator Commander RDM·RUN After Envincing Idol |
Yagudo | ||
| 129-129 | Champion Leader PLD·DRG Before Envincing Idol |
Yagudo | ||
| 137-137 | Champion Commander PLD·DRG After Envincing Idol |
Yagudo | ||
| 129-129 | Empath Leader BST·RNG Before Envincing Idol |
Yagudo | ||
| 137-137 | Empath Commander BST·RNG After Envincing Idol |
Yagudo | ||
| 129-129 | Orisha Leader WHM·SMN Before Envincing Idol |
Yagudo | ||
| 137-137 | Orisha Commander WHM·SMN After Envincing Idol |
Yagudo | ||
| 129-129 | Minnesinger Leader BRD·SAM Before Envincing Idol |
Yagudo | ||
| 137-137 | Minnesinger Commander BRD·SAM After Envincing Idol |
Yagudo | ||
| 129-129 | Spy Leader NIN·BLU Before Envincing Idol |
Yagudo | ||
| 137-137 | Spy Commander NIN·BLU After Envincing Idol |
Yagudo | ||
| 129-129 | Privateer Leader COR·SCH Before Envincing Idol |
Yagudo | ||
| 137-137 | Privateer Commander COR·SCH After Envincing Idol |
Yagudo | ||
| 127-127 | Squadron's Avatar Before Envincing Idol |
Avatar | ||
| 134-134 | Regiment's Avatar After Envincing Idol |
Avatar | ||
| 127-127 | Squadron's Jagil Before Envincing Idol |
Pugil | ||
| 134-134 | Regiment's Crab After Envincing Idol |
Crab | ||
| 127-127 | Squadron's Wyvern Before Envincing Idol |
Wyvern (Dragoon Pet) | ||
| 134-134 | Regiment's Wyvern After Envincing Idol |
Wyvern (Dragoon Pet) | ||
| 129-129 | Leader's Avatar Before Envincing Idol |
Avatar | ||
| 137-137 | Commander's Avatar After Envincing Idol |
Avatar | ||
| 129-129 | Leader's Kraken Before Envincing Idol |
Sea Monk | ||
| 137-137 | Commander's Kraken After Envincing Idol |
|||
| 129-129 | Leader's Wyvern Before Envincing Idol |
Wyvern (Dragoon Pet) | ||
| 137-137 | Commander's Wyvern After Envincing Idol |
Wyvern (Dragoon Pet) | ||
| 142-142 | Volte Warrior After Fii Pexu the Eternal |
Fomor | ||
| 142-142 | Volte Monk After Fii Pexu the Eternal |
Fomor | ||
| 142-142 | Volte White Mage After Fii Pexu the Eternal |
Fomor | ||
| 142-142 | Volte Black Mage After Fii Pexu the Eternal |
Fomor | ||
| 142-142 | Volte Red Mage After Fii Pexu the Eternal |
Fomor | ||
| 142-142 | Volte Thief After Fii Pexu the Eternal |
Fomor | ||
| 142-142 | Volte Paladin After Fii Pexu the Eternal |
Fomor | ||
| 142-142 | Volte Ninja After Fii Pexu the Eternal |
Fomor | ||
| 142-142 | Volte Dragoon After Fii Pexu the Eternal |
Fomor | ||
| 142-142 | Volte Corsair After Fii Pexu the Eternal |
Fomor | ||
| 142-142 | Volte Bard After Fii Pexu the Eternal |
Fomor | ||
| 142-142 | Volte Summoner After Fii Pexu the Eternal |
Fomor | ||
| 142-142 | Volte Beastmaster After Fii Pexu the Eternal |
Fomor | ||
| 142-142 | Volte Samurai After Fii Pexu the Eternal |
Fomor | ||
| 142-142 | Volte Dark Knight After Fii Pexu the Eternal |
Fomor | ||
| 142-142 | Volte Ranger After Fii Pexu the Eternal |
Fomor | ||
| 142-142 | Volte Scholar After Fii Pexu the Eternal |
Fomor | ||
| 142-142 | Volte Puppetmaster After Fii Pexu the Eternal |
Fomor | ||
| 142-142 | Volte Dancer After Fii Pexu the Eternal |
Fomor | ||
| 142-142 | Volte Rune Fencer After Fii Pexu the Eternal |
Fomor | ||
| 142-142 | Volte Blue Mage After Fii Pexu the Eternal |
Fomor | ||
| 142-142 | Volte Geomancer After Fii Pexu the Eternal |
Fomor | ||
| 142-142 | Volte's Puppet After Fii Pexu the Eternal |
|||
| 142-142 | Volte's Avatar After Fii Pexu the Eternal |
|||
| - | Volte's Pet After Fii Pexu the Eternal |
|||
| 142-142 | Volte's Wyvern After Fii Pexu the Eternal |
|||
| 146-146 | Volte Cleaver WAR After Fii Pexu the Eternal |
Fomor | ||
| 146-146 | Volte Fistfighter MNK After Fii Pexu the Eternal |
Fomor | ||
| 146-146 | Volte Incanter BLM After Fii Pexu the Eternal |
Fomor | ||
| 146-146 | Volte Priest WHM After Fii Pexu the Eternal |
Fomor | ||
| 146-146 | Volte Duelist RUN After Fii Pexu the Eternal |
Fomor | ||
| 146-146 | Volte Vagabond THF After Fii Pexu the Eternal |
Fomor | ||
| 146-146 | Volte Crusader PLD After Fii Pexu the Eternal |
Fomor | ||
| 146-146 | Volte Reaper DRK After Fii Pexu the Eternal |
Fomor | ||
| 146-146 | Volte Trainer BST After Fii Pexu the Eternal |
Fomor | ||
| 146-146 | Volte Conductor BRD After Fii Pexu the Eternal |
Fomor | ||
| 146-146 | Volte Sniper RNG After Fii Pexu the Eternal |
Fomor | ||
| 146-146 | Volte Mononofu SAM After Fii Pexu the Eternal |
Fomor | ||
| 146-146 | Volte Shinobi NIN After Fii Pexu the Eternal |
Fomor | ||
| 146-146 | Volte Highwind DRG After Fii Pexu the Eternal |
Fomor | ||
| 146-146 | Volte Controller SMN After Fii Pexu the Eternal |
Fomor | ||
| 146-146 | Volte Joiner BLU After Fii Pexu the Eternal |
Fomor | ||
| 146-146 | Volte Sailor COR After Fii Pexu the Eternal |
Fomor | ||
| 146-146 | Volte Manipulator PUP After Fii Pexu the Eternal |
Fomor | ||
| 146-146 | Volte Twirler DNC After Fii Pexu the Eternal |
Fomor | ||
| 146-146 | Volte Erudite SCH After Fii Pexu the Eternal |
Fomor | ||
| 146-146 | Volte Communer GEO After Fii Pexu the Eternal |
Fomor | ||
| 146-146 | Volte Illusionist RDM After Fii Pexu the Eternal |
Fomor | ||
| 146-146 | Volte's Cluster After Fii Pexu the Eternal |
Cluster | ||
| 146-146 | Volte's Automaton After Fii Pexu the Eternal |
Automaton | ||
| ||||


Strategies/Setups
Setup:
- A balanced alliance of jobs is recommended. One PLD or RUN main tank is sufficient, but a group should bring two just in case.
- Sub NIN for DDs is suggested due to mobs hitting quite hard and back to back AoEs from statues and mid-boss may kill them.
- A main tank for pulling and holding mobs and a 2nd tank for kill order is also recommended. Puller should potentially be a RUN or PLD to minimize casualties.
- One WHM per DD party along with a BRD, COR, GEO and SCH for support and buffing DDs to speed up kills.
- BLM, RDM, SMN, COR, SCH, BRD, or BLUs are required for crowd control via sleeping and nuking of blue eye and red eye statues as they are very melee resistant.
Strategy:
- Pulling mobs without links is suggested to increase survivability.
- Mob killing order is important. Statues should be killed first followed by SMN mobs to avoid an Astral Flow wipe from awakened pets.
- NIN mobs are dangerous with Mijin Gakure as it may kill the entire alliance and should be dealt with last.