Jump to content

Community Dancer Guide

From ZenithXI
Revision as of 12:01, 26 March 2021 by imported>Cavil
(diff) ← Older revision | Latest revision (diff) | Newer revision → (diff)

General Information


This Guide is an amalgamation of various insights from FFXIAH community members who happen to talk passionately about Dancer in this game.


Tis the beatin' of the heart what lays the foundation. Ye embrace it with yer whole body, and then e'er so gently start tappin' out the steps. Yer blood gets t'bubblin' an' ye can hear it percolatin' about in there. An' then ye might stick a twirlin' turn and send it rushin' t'all yer extremities. Shimmies straight up the spine and sends a shudder clean through ye, it does. After that, then she's mine an' no mistakin'. Haven't the faintest where I be or how I got there, I just am. An' everyone around fuels me, each of 'em offerin' up their own—a symphony o' souls. An' that's yer rhythm. Ye cannot help but dance. — 'Laila Brillioth'

Roles

Dancers (DNC) are front-line hybrid class that can benefit the party, enfeeble monsters and deal a lot of DPS if utilized properly. Not only are they competent fighters, but the TP they accumulate is used to fuel their various abilities. They execute Waltzes and Sambas to heal and create beneficial effects, and perform Steps to inflict negative effects upon the enemy. A touch of customization is added with Flourish, which allows a step to be completed with a variety of bonuses to aid the Dancer's party. Obtained by completing the Lakeside Minuet quest.

Abilities and Traits

Job Traits


The following table only lists the Job Traits of a level 99 Dancer and their effects at that level alphabetically. For more information about these Job Traits, e. g. its tiers (if any) and at which level they are attained, they are linked to their BG Wiki pages.

Trait Effect
Accuracy Bonus Accuracy +35
Closed Position Accuracy +3 and Evasion +3 per merit level when facing the target
Conserve TP Cuts down the TP cost of weapon skills 25% of the time
Critical Attack Bonus Critical hit damage +11%
Dual Wield Combined delay -30%
Evasion Bonus Evasion +48
Resist Slow Increases resistance against Slow
Skillchain Bonus Skillchain damage +23%
Subtle Blow Reduced TP fed to enemies by 20%
Tactical Parry 50 TP per parry


These Job Traits define Dancer's base capabilities: a fast-hitting and evasive front-line job with a lot of accuracy and bonuses to both white damage and weapon skills when you close Skillchains with them.

Gifts from Job Points

Gift Cumulative Bonus
Capacity Point Bonus 320%
Physical Defense Bonus 42
Physical Attack Bonus 42
Physical Evasion Bonus 64
Physical Accuracy Bonus 64
Magic Evasion Bonus 36
Magic Accuracy Bonus 36
Subtle Blow Effect 13%
Critical Damage Bonus 8%
Skillchain Bonus 6%
Superior 1 Enables the player to equip items marked as Superior 1 (Su1)
Superior 2 Enables the player to equip items marked as Superior 2 (Su2)
Superior 3 Enables the player to equip items marked as Superior 3 (Su3)
Superior 4 Enables the player to equip Weapons marked as Superior 4 (Su4)
Superior 5 Enables the player to equip Weapons marked as Superior 5 (Su5)
Dual Wield Effect 5% Delay Reduction
Maximum Finishing Moves Bonus 4 added "finishing moves" with a total of 9/9

★Master! Grants the designation "Master Headliner."

Decreases the recast time of one-hour abilities by 15 minutes.


Job Abilities

Dancers have a multitude of Job Abilities, many of which can be found in different "groups". Job Abilities within the same group share recast timers, so using an ability will lock out all other abilities in that group.


Steps & Presto

Steps inflict status ailments on the target by applying so-called "Dazes" to them. The first Step of a Daze effect sets its duration to 1 minute and each subsequent Step applying the same Daze effect increase its remaining duration by 30 seconds, capping at 2 minutes. You have to spend 100 TP for each Step you perform and their shared recast timer is 5 seconds for all steps.

Action Effect Potency
Box Step Lowers target's defense 3% + 2% * (Sluggish Daze level)
Feather Step Lowers target's critical hit evasion (increases player critical hit rate) (Maculele Toe Shoes +1) gives 4% + 1% * (Bewildered Daze level) for a Total 14%
Quickstep Lowers target's evasion 4 * (Lethargic Daze level + 1)
Stutter Step Lowers target's magic evasion 3 * (Weakened Daze level)
Presto Enhances the effect of the next Step and grants an additional Finishing Move. 15 seconds
  • Unless the Daze effect level has reached the cap (currently level 10) already, each successful Step grants you 2 Finishing Moves and wielding a Terpsichore adds 1 Finishing Move on top of that for a total of up to 3 Finishing Moves per Step. If however the Daze effect level was capped already, you will gain only 1 Finishing Move, no matter what.
  • The success rate of Steps depends on the Dancer's physical hit rate and therefore caps at 99%. Each Step gets an innate Accuracy +10 bonus and a level 99+ Terpsichore adds another Accuracy +60 to that. Gear that specifically enhances "Step Accuracy" should not be carried for the sole purpose of increasing Step Accuracy, because there are pieces that give you at least the same increase to accuracy, if not more, in every slot.
  • The effect of Steps cannot be resisted, so if you can hit the target, you can apply Dazes. They however can be removed by effects that remove status ailments, e. g. Erase.
  • Most of the time, you are going to use either Quickstep and/or Box Step. Having both at level 10 and maintaining that level lowers your target's defense by 23% and evasion by 44, effectively increasing attack by (at least) 29.8% and accuracy by 44 for everyone attacking your target. Especially Box Step is useful for low-man sitautions where accuracy is likely to be capped with attack being far from cap due to lack of buffs and/or debuffs.
  • In party situations, the rise of GEO means that you very often have absurd amounts of defense reduction and attack enhancing effects up, so ratio is more likely to be capped, except for fights that puts penalty on GEO bubbles. Here, it might be more useful to use Feather Step instead, because critical hit rate is something that often is not affected by buffs. Feather Step also has another use case: For things that are being whacked by many players at the same time, e. g. Wildskeeper Reives, and Domain Invasion, it might be more reliable than Box Step or Quickstep for building Finishing Moves. Feather Step is limited to main job Dancers, whereas the other Steps can be used by anyone with a Dancer sub job.
  • Over the course of many years, Stutter Step probably only has been used to increase the accuracy of the Stun effect caused by Violent Flourish. Which sounds like a bad strategy to begin with, if you actually need Stun effects, but now that Dancers might see the inside of harder content more often, Stutter Step might be used for a similar purpose in pinch: If your stunners are close to hitting the Stun wall, you can help them a bit and hope that your target goes down before crashing into the Stun wall or you can have 10/10 Stutter for that -30 MEVA on the target just in case your GEO was using "Other" Bubbles.
  • Using a Step with Presto up gives it an accuracy bonus of +50, as well as adding two levels to the Daze effect associated with the Step, if possible. It will not magically let you break the Daze hard cap of level 10. Presto also grants you 5 additional Finishing Moves. You still get only one Finishing Move upon successfully using a Step that is "capped" already.

Proposed Steps Set/ also works as highest Acc Set:

Steps  
File:Setan Kober icon.pngFile:Setan Kober description.png
File:Maxixi Tiara +3 icon.pngFile:Maxixi Tiara +3 description.png File:Etoile Gorget +2 icon.pngFile:Etoile Gorget +2 description.png File:Mache Earring +1 icon.pngFile:Mache Earring +1 description.png File:Mache Earring +1 icon.pngFile:Mache Earring +1 description.png
File:Maxixi Casaque +3 icon.pngFile:Maxixi Casaque +3 description.png File:Maxixi Bangles +3 icon.pngFile:Maxixi Bangles +3 description.png File:Chirich Ring +1 icon.pngFile:Chirich Ring +1 description.png
File:Senuna's Mantle description.png
File:Olseni Belt icon.pngFile:Olseni Belt description.png File:Maxixi Tights +3 icon.pngFile:Maxixi Tights +3 description.png File:Horos T. Shoes +3 description.png

Try your best to use steps at start of battle and right after WS to minimize the loss in DPS and exploit the WS animation to gain as many steps as possible

Waltz

These probably are the defining Job Ability groups for Dancers. "Groups"? I am listening them together, but technically, Waltzes are split into three groups that each have their own recast timer. Similar to Steps, you have to spend TP to use Waltzes, but the exact amount of TP is different for each Waltz.

Ability Recast TP cost
Curing Waltz 6 seconds 200
Curing Waltz II 8 seconds 350
Curing Waltz III 10 seconds 500
Curing Waltz IV 12 seconds 650
Curing Waltz V 16 seconds 800
  • Curing Waltzes are single target cures for any target within casting range. You will find that most of the time, you are going to use these ones.
  • Waltz potency caps at 50% and Waltz potency *recieved* caps at 30%. Once you hit this cap, any remaining slots can be filled with pieces that boost CHR. Herculean set can be augmented to have Waltz Potency.


Waltz  
File:Horos Tiara +3 description.png File:Etoile Gorget +2 icon.pngFile:Etoile Gorget +2 description.png File:Roundel Earring icon.png
File:Maxixi Casaque +3 icon.pngFile:Maxixi Casaque +3 description.png File:Valseur's Ring icon.png File:Carb. Ring +1 icon.pngFile:Carb. Ring +1 description.png
File:Senuna's Mantle description.png File:Dashing Subligar icon.pngFile:Dashing Subligar description.png File:Maxixi Toe Shoes +3 icon.pngFile:Maxixi Toe Shoes +3 description.png

Waltz 3 will be the most HP/TP efficient once you hit potency cap. Curing Waltz 4/5 are also comparably HP/TP efficient now, just keep in mind how much you heal to avoid overheal and thus wasted TP. Higher tier waltzes need to be used less frequently and thus may have have less of an impact on your DPS.


Ability Recast TP cost
Divine Waltz 13 seconds 400
Divine Waltz II 20 seconds 800
  • Divine Waltzes are the Curaga equivalent for Waltzes. They can target anyone within your party who is in range of you.
  • Note that Divine Waltzes and Curing Waltzes do not share the same recast timer, which can help getting your entire party back to healthy HP levels quickly in a pinch.

Divine Waltz II is your most efficient option if you're going to hit 3+ targets for the full amount (~900HP).

Ability Recast TP cost
Healing Waltz 8 seconds 200

Healing Waltz is our (almost) all-purpose Erase. It can get rid of pretty much any status ailment that a WHM can remove with Erase or their -na spells.

Ability Recast Effect
Contradance 5 minutes Enhances your next Waltz

If Healing Waltz is our Erase, then Contradance is our Divine Seal. It doubles the potency for your next Curing Waltz or Divine Waltz; using Contradance with Healing Waltz lets it remove one status ailment from each party member.

Flourishes I

Flourishes I consume Finishing Moves to inflict an effect on your target.

Flourishes I Recast FMs consumed Effect
Animated Flourish 30 seconds 1 or 2 Provokes target
Desperate Flourish 20 seconds 1 Weighs target down with a low rate of success
Violent Flourish 20 seconds 1 Stuns target with a low rate of success
  • The main purpose of this group is to provide Dynamis and Voidwatch procs. Rarely will you use any of these in other places except probably for "Animated Flourish".
  • Animated Flourish is a claiming tool at best, because its effect is weaker than Provoke: If you have only one Finishing Move, it will consume that and generate 1000 Volatile Enmity. If you have two or more Finishing Moves, it will consume two and generate 1500 Volatile Enmity.
  • Desperate Flourish will only be used as a Voidwatch proc. If you want to weigh down your target, Rudra's Storm is a lot better at doing that. In fact, I don't even know why you would want to weigh down your target to begin with.
  • Violent Flourish on the other hand comes with a high accuracy bonus, but that's limited to the physical hit. The Stun effect unfortunately is resisted by many targets. Horos Casaque +3 enhance the accuracy of the Stun effect. With the current game meta of massive MAAC for mele Jobs one can safely assume that it will land quite frequently than before.


Violent Flourish  
File:Setan Kober icon.pngFile:Setan Kober description.png
File:Mummu Bonnet +2 description.png File:Etoile Gorget +2 icon.pngFile:Etoile Gorget +2 description.png File:Hermetic Earring icon.png
File:Horos Casaque +3 description.png File:Mummu Wrists +2 description.png File:Stikini Ring +1 icon.pngFile:Stikini Ring +1 description.png File:Stikini Ring +1 icon.pngFile:Stikini Ring +1 description.png
File:Senuna's Mantle description.png
File:Eschan Stone icon.png File:Horos Tights +3 description.png File:Mummu Gamash. +2 description.png


Flourishes II


Flourishes II Recast FMs consumed Effect
Building Flourish 10 seconds 1-3 Enhances the next weapon skill
Reverse Flourish 30 seconds 1-5 Converts Finishing Moves to TP
Wild Flourish 20 seconds 2 Readies target for a skillchain


Reverse Flourish is one of the most valuable of all Flourishes II. By converting your remaining Finishing Moves into TP, you can get instant TP to perform back to back weapon skills for a Skillchain or to close a Skillchain off of someone else's weapon skill. Along with No Foot Rise, it also can be used as a source for starting TP, letting you being fights with a good amount of TP. The maximum amount of TP if 5/5 RF and 20/20 JP with Max Cape is:

TP Return = (95 + Reverse Flourish Bonus) × (Finishing moves) + (Square Mod+Empyrean Hands Bonus)×(Finishing moves)^2 + 30×(Merit Level)

This will yield if we have the maximum Reverse Flourish Bonus (70) and 5/5 RF Merits

RF of (1FM)=332 TP RF of (2FM)=548 TP RF of (3FM)=798 TP RF of (4FM)=1082 TP RF of (5FM)=1400 TP

The amount of TP restored is calculated using this formula:

TP Return = (95 + Reverse Flourish Bonus) × (Finishing moves) + (Square Mod+Empyrean Hands Bonus)×(Finishing moves)^2 + 30×(Merit Level)

Reverse Flourish  
File:Macu. Bangles +1 icon.pngFile:Macu. Bangles +1 description.png
File:Toetapper Mantle description.png


The effect of Building Flourish depends on the number of Finishing Moves available when using it. The maximum number of Finishing Moves it consumes is 3.

Number of FMs Effect
1 Accuracy bonus
2 Accuracy bonus, attack +25%
3 Accuracy bonus, attack +25%, critical hit rate bonus


  • Between Reverse Flourish and Wild Flourish, it is hard to justify using Building Flourish, even though its effect is powerful, because those Finishing moves might either be used for Wild Flourish or Reverse Flourish for more overall damage.
  • Wild Flourish is best used in places where two weapon skills and the resulting Skillchain would be overkill, but one weapon skill and the resulting Skillchain deal enough damage to deplete your target's HP. Since it affects your target, it can be used as a Dynamis proc. It also is a possible Voidwatch proc.


Weapon Skill Resulting Skillchain
Dancing Edge Scission
Evisceration Transfixion
Exenterator Scission
Pyrrhic Kleos Scission


Flourishes III

Our most devastating Abilities!!!

Flourishes III consume Finishing Moves for offensive buffs affecting the Dancer.

Flourishes III Recast FMs consumed Effect
Climactic Flourish 90 seconds 1-5 Enforces a Critical hit for the first hit of a certain number of attack rounds.

Adds a base damage bonus of 50% CHR.

Striking Flourish 30 seconds 2 Enforces a Double attack for the next attack round.

Adds a base damage bonus of 100% CHR for the first hit.

Ternary Flourish 30 seconds 2 Enforces a Triple attack for the next attack round.

Adds a base damage bonus of 100% CHR for the first hit.


Climactic Flourish enforces a critical hit for the first hit of one attack around per consumed Finishing Move. Due to the nature of Rudra's Storm, Climactic Flourish is best paired with that weapon skill. Performing back to back Rudra's Storms for Darkness can deal devastating amounts of damage very fast. Maculele Tiara +1 is crucial for Climactic Flourish. Wearing it upon activation adds another critical hit, up to 6 attack rounds with critical first hits for 5 consumed Finishing Moves. Wearing it during the actual hits grants you a 25% critical attack bonus, which is a huge boost to weapon skills that deal the majority of their damage during the initial hit.

It's a little bit complicated to create a solo Skillchain involving Climactic Flourish, because it consumes all Finishing Moves. You can perform a Step, preferably with Presto, after activating Climactic Flourish and before your weapon skill and/or use No Foot Rise after your weapon skill. Stepping before the first weapon skill means you have more TP towards your second weapon skill. For the same reason, No Foot Rise is used after your first weapon skill, because it also grants you TP when used with an augmented Horos Casaque +3


An easier way to perform solo Skillchains with Climactic Flourish is using Sekkanoki when using a Samurai sub job.

Striking Flourish and Ternary Flourish on the other hand are best used with Dancer's multi-hit weapon skills, especially Pyrrhic Kleos. When using Fotia Belt and Fotia Gorget for this weapon skill, each extra hit adds another 1.95 fTP to damage calculation.

The CHR bonus works exactly like Sneak Attack and Trick Attack: It is added to the base damage outside the fTP term:

Quote: WS damage = ((DMG + fSTR + WSC) * fTP + (CHR bonus)) * pDIF


SP Abilities

Ability Effect
Trance Reduces the TP cost of all Job Abilities to 0 and reduces recast timers for all Waltzes
Grand Pas Grants 5 Finishing Moves.

Resets recast timers for Flourishes to 0 while active and Flourishes don't consume Finishing Moves


Trance used to be your emergency button for when you really need to spam Waltzes in quick succession. Thanks to Job Points, it now grants you up to 2000 TP upon using it, turning it into another source of instant TP.

Grand Pas also can be used for that purpose by repeatedly using Reverse Flourish. Most of the time, Grand Pas is used as a zerg tool by chaining multiple weapon skills, possibly stacked with Climactic Flourish, in short order.

The best way is to use these two SP's simultaneously and preform devastating Climactic Rudras back to back in a very short window, Have your steps ready and 3K TP and:

Outside of Escha: Climactic > Rudra > RF > Grand pas > Rudra > RF Rudra > Trance Rudra > RF Rudra > RF Rudra > engage, make tp > Climactic > Rudra > make TP > Rudra - 8 climactic Rudras

In Escha: Climactic > Rudra > RF > Grand pas > Rudra > RF Rudra > Trance Rudra > RF Rudra > RF Rudra > Revit > Climactic > RF Rudra > wing Rudra > wing Rudra - 9 Climactic Rudras without TPing (could go for 10 with TPing before Revit)

Merits

Group I Effect
Building Flourish effect Increases Building Flourish accuracy by 2, attack by 1%, and critical hit rate by 1% per merit level each.
Haste Samba effect Adds 1% Job Ability Haste to Haste Samba per merit level.
Reverse Flourish effect Increases TP returned by Reverse Flourish by 3 TP per merit level.
Steps accuracy Increases the accuracy of Steps by 3 per merit level.

Dancer's group I merits are pretty clear: 5/5 Haste Samba effect and 5/5 Reverse Flourish effect. Steps don't need any extra help with accuracy between their innate accuracy bonus of +10 and Presto. As for Building Flourish... can be easily used when CF timer is down for WS.

Group II Effect
Closed Position Increases accuracy and evasion by 3 per merit level when face-to-face with the enemy.
Fan Dance Reduces physical damage taken and gives "Enmity +15".

Reduces Waltz recast timers by 5% for each merit level past the first one. Renders Sambas unusable.

No Foot Rise Grants 1 Finishing Move per merit level.
Saber Dance Increases Double Attack rate. Increases Samba duration by 5% for each merit level past the first one.

Renders Waltzes unusable.

Recast Duration for Fan Dance, Saber Dance and NFR is 3 Minutes.

The group II merits used to be more complicated and the "right" setup has changed many times during the last few years. These days, the most common setup is this one after Relic +3 Upgrades:

3/5 No Foot Rise feels like the right number, because it caps Finishing Moves from scratch with just one extra Step. It also provides enough TP by itself to get to 1000 TP with Reverse Flourish after a WS and 1-2 attack rounds for a self-Skillchain, when used with Horos Casaque +3.

Support Jobs

Based on your play style and/or the Content you're participating in, along with what REMA you're using, Support Jobs may vary:

  • Thief is a very attractive option in endgame (namely Erinys and Teles) if you utilize Rudra's Storm, this means you can potentially double the amount of forced critical Rudras Using Sneak Attack during these fights.
  • Warrior is usually the go to option if you wanted to maximize your DPS, especially if you're a Twashtar III holder since your white Damage will gain a major boost from Multi-hit in gear and traits, just remember when you utilize Saber Dance (DA from WAR will be rendered obsolete).
  • Dark Knight is also a valid option and can add extra power to your DPS, rarely used though due to capped attack situations these days from support jobs in party.
  • Samurai is another attractive option for DPS and becomes a great candidate if you're a Mythic wielder due to its native STP trait and how Terp functions.
  • Ninja and Rune Fencer are great for defensive purposes and the drop in DPS isn't that significant if you prioritize survivability.

Weapons

Dancers are super proficient at wielding daggers. And super non-proficient at wielding other weapons. While swords and some fists are actually wearable options, they only are useful in... maybe spots where piercing Piercing damage does not work or you need blunt damage in some fights like Master Trails. Let alone the fact that all swords Dancers can equip deal piercing damage and the only source of slashing Slashing damage is Vampiric Claws and in regards to blunt, now we can use Kaja Knuckles which is still not in final form.

Lets get serious now and discuss Daggers:

If you aligned with Dancer as your career Job in this game, then you obviously will try to pursue [EMA] Weapons [ Twashtar (Level 119 III), Terpsichore (Level 119 III), Aeneas) ! These weapons are extremely powerful and each one shines depending on the situation but they will require a lot of resources and time to make them of course.

For Maximum potential, most players agree on (Terp/Twashtar) combination to attain the highest DPS possible and preform better on all other aspects of the job. With this combination you don't have to worry that much about WS order in fights with other DPS members and will definitely cause severe damage overall, also it will make life easier on steps and tanking without losing that much of your overall DPS with AM3 up.

With recent game meta (very short fights and capped buffs) (Twashtar/Centovente) is a new contender that is becoming increasingly popular if you decided to go full on ZERG and implement the devastating abilities of Dancer (e.g. Climactic Rudra and Multi SC order in the fight). For longer fights its best to use (Twashtar/Taming Sari) or (Twashtar/Airy Buckler) since the scale will tip towards white damage more.


Terpsichore (Level 119 III):

  • This is our Mythic Weapon and requires a lot of time and resources to make, so if you're serious about it, you should definitely make one.
  • This weapon allows user to use the weaponskill Pyrrhic Kleos and gives 30% increase in damage when used.
  • AM3 up gives access to OAT for 3 minutes and trust me you wont even have enough time to react to the amount of TP you generate!!!
  • Afterglow gives an Attack/Ranged Attack boost (+15)
  • Step Accuracy+60.
  • Gives one extra Finishing Move per Step.
  • Good luck making it, its definitely a beautiful weapon to have.
  • With R15 maxed out and in Main Hand only, Terp becomes absolutely broken with; DMG: +16 Pyrrhic Kleos: DMG +15% Accuracy +30 Mac. Acc. +30


Twashtar (Level 119 III):

  • This is our Empyrean Weapon and it requires a lot of Gil to finish, if you're willing to invest in it you will never be disappointed by its outcomes.
  • It has insane amount of DEX making Rudra ever more powerful.
  • Afterglow gives a Critical Hit Rate boost (+5%) that gives your DPS partners a huge boost to their DPS for 30 seconds (you can imagine what it can do to critical based WS's)
  • AM3 up opens the door to triple damage for 3 Minutes on [Mele hits & multi-hits] eventually making a jaw-dropping reaction from players when they notice your white damage spikes.
  • With this weapon main hand you will become a killing machine and see damage like never before.
  • With R15 maxed out and in Main Hand only, it becomes more OP with; DMG: +4 Rudra's Storm: DMG +10% DEX & AGI +20


Aeneas:

  • This is our Aeonic Weapon and requires skill and knowledge to acquire, if you have the beads and a willing group to clear it then by all means do it.
  • Allows the user to perform an Ultimate Skillchain and gives dancers the ability to make "light" skill chains finally!!!!
  • This weapon allows the user to use the Merit Point weaponskill Exenterator at full "Rank 5" strength with no merit points invested.
  • The TP Bonus from this weapon is not applied to weapon skills when it is wielding in the off hand slot.
  • its definitely an attractive (easy yo get) weapon and you will enjoy the ultimate skill chain aspect of it! this weapon shows the real power behind Dancer's skill chain properties.
  • With R15 maxed out and in Main Hand only, it comes with; DMG: +6 Exenterator: DMG +10% Accuracy +30 & Mag. Acc. +30

Now with [EMA] aside, what else can dancers use and still be efficient?


Tauret:

  • The final upgrade from Kaja Knife by using 5 Abdhaljs Matter and any Pulse Weapon.
  • This Dagger is incredible for spamming Evisceration at 1K, and should definitely be ranked amongst legendary weapons for Dancers.
  • Best High DMG, low delay option for none EMA and a great offhand if you don't have Twashtar or Perfect Taming Sari.
  • This Dagger when equipped in main it will offer access to Evisceration, with an added 50% boost to wsDMG across all hits and will increase the chance of critical hits based with lower TP according to this decay formula:

Assuming exponential decay: y = a(1 - r)^x where: a = initial value (the amount before measuring decay)=50, r = decay rate (most often represented as a percentage and expressed as a decimal) and its now calculated as 0.35, x = value of TP used divided by 1000, y = critical rate percentage

  • At 1k TP you will have 17.5% critical rate, at 2k TP you will have 6% critical rate, and at 3k TP you will have 2.5% critical rate based on the latest sample tests.
  • With Feather Step 10/10, Rogue's Roll 11 crooked and your merits; you would notice how incredible this dagger is in longer fights, both in white damage and ws, since the moment you have all these buffs and capped dDEX, your critical hit rate should reach 81.5% at 1K TP.
  • Good Luck getting it from Ambuscade Weapons.
  • Main Hand: "Evisceration", "Evisceration" damage +50%, increase critical hits based with lower TP.

File:Setan Kober icon.png Setan Kober:

  • This is our new Divergence Weapon to add to your arsenal.
  • At first glance it might look underwhelming but this Dagger is incredible and as of now its the best Accuracy option.
  • Coupled with Horos Toe Shoes +3 your steps will only consume 40 TP and this will have major impact on lost DPS during stepping.
  • This Dagger can be equipped on main and offhand simultaneously making steps free.
  • Good Luck getting it from Blacksmith's aurum tome or buying it off the AH.

Augments:

  • Path A: Main Hand: Double Damage +50%, Store TP +25, DMG +5
  • Path B: Main Hand: Follow-up Attack +50%, Subtle Blow II +25, DMG +5
  • Path C: Main Hand: Flourish Recast Time -25%, Step Duration +60, DMG +5


File:Taming Sari icon.png Taming Sari:

  • This Dagger is incredible and if you managed to get the perfect augments on it then you will be really satisfied of its outcomes.
  • This Dagger can be equipped on main and offhand simultaneously and you will notice how incredible this combination is (Also Hello TH2?)
  • Good Luck getting it from Sinister Reign
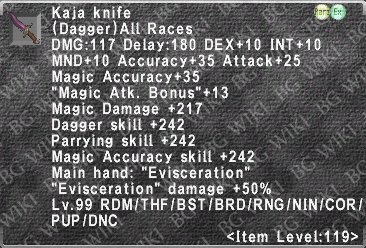

Kaja Knife:

  • This is our new Ambuscade Weapon to add to your arsenal, and its still not in its final form.
  • This Dagger is incredible for returning/new players.
  • High DMG, low delay option for none DEMA.
  • This Dagger when equipped in main it will offer access to Evisceration, with an added 50% boost to wsDMG across all hits.
  • Good Luck getting it from Ambuscade Weapons.
  • Main Hand: "Evisceration", "Evisceration" damage +50%

File:Raetic Kris +1 icon.png Raetic Kris +1:

  • This Dagger is a beast!! and if you managed to get one provided that you have source of refresh, you will not be disappointed at all.
  • This Dagger is best equipped with Twashtar to have the best results (lowest delay combo and one of the highest DPS).
  • Good Luck getting it from Blacksmithing and the crafter will need Blacksmith's argentum tome, you can also buy it.


File:Centovente icon.png Centovente:

  • This Dagger can potentially give the highest DPS in offhand when you go [TP Bonus +1000] and Pair it with Twashtar (Level 119 III) or Setan Kober B.
  • It will require a metric ton of accuracy in what is considered high end content, even if DNC has one of the highest Accuracy in game; it's estimated that on Omen Bosses for instance you would need approximately 120-140 more Accuracy than normal buffs to cover the loss in offhand.
  • Good Luck getting it from Dagger Trials in Weaponskill Trials via Magian Moogle.
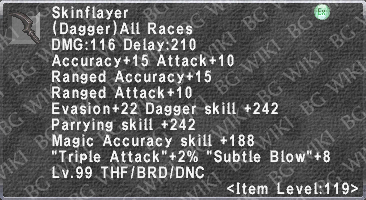

Skinflayer

  • This Dagger can be obtained from Strophadia in Reisenjima and further augmented with the help of Oseem.
  • Try your best to get at least 15 DMG 10 DEX 20 ACC 20 ATTk and TA3.
  • This is an excellent Dagger if you managed to gain powerful augments, and you can double wield it like Taming Sari~
  • Good Luck on augments.


File:Polyhymnia icon.png Polyhymnia:

  • Obtained from Oboro and its our JSE weapon, easy to get.
  • It will serve new/returning players a great deal and should be considered as first option.
  • Can be further augmented with Accuracy +50, Store TP +8, Weapon Skill Damage +5%.


File:Enchufla icon.png Enchufla: Obtained from Hanbi in Escha - Ru'Aun and can be upgraded through the help of Nolan and Path C seems like a well grounded option.


Equipment Sets

Starter TP: Assuming no JP and cheapest gear.

TP Starter Set  
File:Polyhymnia icon.pngFile:Polyhymnia description.png
File:Skormoth Mask icon.png File:Asperity Necklace icon.pngFile:Asperity Necklace description.png File:Brutal Earring icon.pngFile:Brutal Earring description.png
File:Mummu Wrists +2 description.png File:Petrov Ring icon.png File:Epona's Ring icon.pngFile:Epona's Ring description.png
File:Senuna's Mantle description.png
File:Kentarch Belt +1 icon.png File:Meg. Chausses +2 description.png File:Macu. Toe Shoes +1 icon.pngFile:Macu. Toe Shoes +1 description.png

Best in Slot TP: Theoretically, the best DPS output when you spam Rudra exactly at 1k TP [ Please note you will require much more acc than normal buffs, to cover the loss in offhand accuracy].

TP Best in Slot  
File:Twashtar (Level 119 III) description.png File:Centovente icon.pngFile:Centovente description.png
File:Adhemar Bonnet +1 icon.png
File:Etoile Gorget +2 icon.pngFile:Etoile Gorget +2 description.png
File:Horos Casaque +3 description.png File:Adhemar Wrist. +1 icon.png
File:Epona's Ring icon.pngFile:Epona's Ring description.png
File:Senuna's Mantle description.png
File:Windbuffet Belt +1 icon.pngFile:Windbuffet Belt +1 description.png File:Samnuha Tights icon.pngFile:Samnuha Tights description.png
File:Horos T. Shoes +3 description.png


Acc TP Best in Slot  
File:Twashtar (Level 119 III) description.png File:Setan Kober icon.pngFile:Setan Kober description.png
File:Horos Tiara +3 description.png File:Etoile Gorget +2 icon.pngFile:Etoile Gorget +2 description.png File:Mache Earring +1 icon.pngFile:Mache Earring +1 description.png File:Mache Earring +1 icon.pngFile:Mache Earring +1 description.png
File:Horos Casaque +3 description.png File:Adhemar Wrist. +1 icon.png
File:Moonlight Ring icon.pngFile:Moonlight Ring description.png
File:Senuna's Mantle description.png
File:Olseni Belt icon.pngFile:Olseni Belt description.png File:Maxixi Tights +3 icon.pngFile:Maxixi Tights +3 description.png File:Horos T. Shoes +3 description.png

Twashtar TP Set:

Utilizing Fencer from /WAR is vital for this combo to preform its best, more DPS options for us to choose from.

TP Twashtar  
File:Twashtar (Level 119 III) description.png File:Airy Buckler icon.png
File:Adhemar Bonnet +1 icon.png
File:Etoile Gorget +2 icon.pngFile:Etoile Gorget +2 description.png
File:Horos Casaque +3 description.png File:Adhemar Wrist. +1 icon.png
File:Epona's Ring icon.pngFile:Epona's Ring description.png
File:Senuna's Mantle description.png
File:Windbuffet Belt +1 icon.pngFile:Windbuffet Belt +1 description.png File:Samnuha Tights icon.pngFile:Samnuha Tights description.png
File:Horos T. Shoes +3 description.png

Bonus Set when you have AM3 up from Twashtar and you can't WS as often as you wish due to fight mechanics, and the point is to depend on White Damage, this set will provide [Critical hit damage +42% and 39% Crtical hit rate] + 14% critical hit rate from Feather Step:

TP AM3 Up  
File:Twashtar (Level 119 III) description.png
File:Charis Feather icon.pngFile:Charis Feather description.png
File:Adhemar Bonnet +1 icon.png
File:Etoile Gorget +2 icon.pngFile:Etoile Gorget +2 description.png File:Brutal Earring icon.pngFile:Brutal Earring description.png
File:Mummu Jacket +2 description.png File:Adhemar Wrist. +1 icon.png
File:Senuna's Mantle description.png
File:Windbuffet Belt +1 icon.pngFile:Windbuffet Belt +1 description.png File:Turms Subligar +1 icon.pngFile:Turms Subligar +1 description.png

Terpsichore TP SET:

Its plausible to use STP set with Mythic Weapons since AM takes care of the multi hit gear easily if it was maintained at level 3 [Terp gives ± 70 per hit so you might need to hit 80 STP in gear, buffs and sub job STP values] [the margins of STP Set and MultiHit Set can be minuscule depending on sub job options and provided buffs, for more explanation refer to this thread http://www.ffxiah.com/forum/topic/31534/math-oax-multi-attack-and-you/3/]

TP Terpsichore  
File:Terpsichore (Level 119 III) description.png File:Twashtar (Level 119 III) description.png
File:Adhemar Bonnet +1 icon.png
File:Etoile Gorget +2 icon.pngFile:Etoile Gorget +2 description.png
File:Horos Casaque +3 description.png File:Adhemar Wrist. +1 icon.png
File:Epona's Ring icon.pngFile:Epona's Ring description.png
File:Senuna's Mantle description.png
File:Windbuffet Belt +1 icon.pngFile:Windbuffet Belt +1 description.png File:Samnuha Tights icon.pngFile:Samnuha Tights description.png
File:Horos T. Shoes +3 description.png

This set provides 72+15=87 STP when /SAM. Enough to cover everything you need and make your round/ws the lowest among any other combination [could possibly hit 1.9-2.1 rounds/ws]

Dual Wield Scenarios

When/if one needed to cap delay in situations where Haste Samba isn't an option, can't get Haste II or Marches, and/or you're weak/zombi, and lastly if you're solo with trusts, you should use these sets:

0% Haste  
File:Maxixi Tiara +3 icon.pngFile:Maxixi Tiara +3 description.png File:Etoile Gorget +2 icon.pngFile:Etoile Gorget +2 description.png
File:Adhemar Jacket +1 icon.png
File:Moonlight Ring icon.pngFile:Moonlight Ring description.png File:Epona's Ring icon.pngFile:Epona's Ring description.png
File:Senuna's Mantle description.png
File:Samnuha Tights icon.pngFile:Samnuha Tights description.png
File:Horos T. Shoes +3 description.png
10% Haste  
File:Maxixi Tiara +3 icon.pngFile:Maxixi Tiara +3 description.png File:Etoile Gorget +2 icon.pngFile:Etoile Gorget +2 description.png
File:Adhemar Jacket +1 icon.png
File:Adhemar Wrist. +1 icon.png
File:Moonlight Ring icon.pngFile:Moonlight Ring description.png File:Epona's Ring icon.pngFile:Epona's Ring description.png
File:Senuna's Mantle description.png
File:Samnuha Tights icon.pngFile:Samnuha Tights description.png
File:Horos T. Shoes +3 description.png
40% Haste  
File:Maxixi Tiara +3 icon.pngFile:Maxixi Tiara +3 description.png File:Etoile Gorget +2 icon.pngFile:Etoile Gorget +2 description.png
File:Horos Casaque +3 description.png File:Adhemar Wrist. +1 icon.png
File:Moonlight Ring icon.pngFile:Moonlight Ring description.png File:Epona's Ring icon.pngFile:Epona's Ring description.png
File:Senuna's Mantle description.png
File:Windbuffet Belt +1 icon.pngFile:Windbuffet Belt +1 description.png File:Samnuha Tights icon.pngFile:Samnuha Tights description.png
File:Horos T. Shoes +3 description.png


Weapon Skills

Climactic Rudra  
File:Charis Feather icon.pngFile:Charis Feather description.png
File:Maculele Tiara +1 icon.pngFile:Maculele Tiara +1 description.png File:Etoile Gorget +2 icon.pngFile:Etoile Gorget +2 description.png File:Ishvara Earring icon.png File:Moonshade Earring icon.pngFile:Moonshade Earring description.png
File:Meg. Cuirie +2 description.png File:Maxixi Bangles +3 icon.pngFile:Maxixi Bangles +3 description.png
File:Senuna's Mantle description.png
File:Grunfeld Rope icon.png File:Horos Tights +3 description.png
Normal Rudra  
File:Charis Feather icon.pngFile:Charis Feather description.png
File:Etoile Gorget +2 icon.pngFile:Etoile Gorget +2 description.png File:Ishvara Earring icon.png File:Moonshade Earring icon.pngFile:Moonshade Earring description.png
File:Maxixi Bangles +3 icon.pngFile:Maxixi Bangles +3 description.png
File:Senuna's Mantle description.png
File:Grunfeld Rope icon.png File:Horos Tights +3 description.png
Starter Rudra  
File:Polyhymnia icon.pngFile:Polyhymnia description.png File:Charis Feather icon.pngFile:Charis Feather description.png
File:Mummu Bonnet +2 description.png
File:Caro Necklace icon.png File:Ishvara Earring icon.png File:Moonshade Earring icon.pngFile:Moonshade Earring description.png
File:Meg. Cuirie +2 description.png File:Meg. Gloves +2 description.png File:Ramuh Ring +1 icon.pngFile:Ramuh Ring +1 description.png
File:Senuna's Mantle description.png
File:Grunfeld Rope icon.png File:Mummu Kecks +2 description.png File:Mummu Gamash. +2 description.png
  • Evisceration:
Evisceration  
File:Charis Feather icon.pngFile:Charis Feather description.png
File:Adhemar Bonnet +1 icon.png
File:Fotia Gorget icon.pngFile:Fotia Gorget description.png File:Mache Earring +1 icon.pngFile:Mache Earring +1 description.png
File:Meg. Cuirie +2 description.png File:Mummu Wrists +2 description.png
File:Senuna's Mantle description.png
File:Fotia Belt icon.pngFile:Fotia Belt description.png File:Lustr. Subligar +1 icon.png
Starter Evisceration  
File:Charis Feather icon.pngFile:Charis Feather description.png
File:Mummu Bonnet +2 description.png File:Fotia Gorget icon.pngFile:Fotia Gorget description.png File:Brutal Earring icon.pngFile:Brutal Earring description.png
File:Meg. Cuirie +2 description.png File:Mummu Wrists +2 description.png File:Ramuh Ring +1 icon.pngFile:Ramuh Ring +1 description.png
File:Senuna's Mantle description.png
File:Fotia Belt icon.pngFile:Fotia Belt description.png File:Mummu Kecks +2 description.png File:Mummu Gamash. +2 description.png

* Pyrrhic Kleos:

Pyrrhic Kleos  
File:Lustratio Cap +1 icon.png
File:Fotia Gorget icon.pngFile:Fotia Gorget description.png File:Mache Earring +1 icon.pngFile:Mache Earring +1 description.png
File:Horos Casaque +3 description.png File:Adhemar Wrist. +1 icon.png
File:Epona's Ring icon.pngFile:Epona's Ring description.png
File:Senuna's Mantle description.png
File:Fotia Belt icon.pngFile:Fotia Belt description.png File:Samnuha Tights icon.pngFile:Samnuha Tights description.png
File:Lustra. Leggings +1 icon.png
PK Striking Flourish  
File:Lustratio Cap +1 icon.png
File:Fotia Gorget icon.pngFile:Fotia Gorget description.png File:Mache Earring +1 icon.pngFile:Mache Earring +1 description.png
File:Macu. Casaque +1 icon.pngFile:Macu. Casaque +1 description.png File:Adhemar Wrist. +1 icon.png
File:Epona's Ring icon.pngFile:Epona's Ring description.png
File:Senuna's Mantle description.png
File:Fotia Belt icon.pngFile:Fotia Belt description.png File:Samnuha Tights icon.pngFile:Samnuha Tights description.png
File:Lustra. Leggings +1 icon.png
PK Starter  
File:Skormoth Mask icon.png File:Fotia Gorget icon.pngFile:Fotia Gorget description.png File:Brutal Earring icon.pngFile:Brutal Earring description.png
File:Mummu Wrists +2 description.png File:Ifrit Ring +1 icon.pngFile:Ifrit Ring +1 description.png File:Epona's Ring icon.pngFile:Epona's Ring description.png
File:Senuna's Mantle description.png
File:Fotia Belt icon.pngFile:Fotia Belt description.png File:Meg. Chausses +2 description.png File:Rawhide Boots icon.png


Exenterator  
File:Aeneas description.png File:Taming Sari icon.pngFile:Taming Sari description.png
File:Charis Feather icon.pngFile:Charis Feather description.png
File:Fotia Gorget icon.pngFile:Fotia Gorget description.png File:Brutal Earring icon.pngFile:Brutal Earring description.png
File:Horos Casaque +3 description.png
File:Senuna's Mantle description.png
File:Fotia Belt icon.pngFile:Fotia Belt description.png File:Meg. Chausses +2 description.png
AE  
File:Aeneas description.png
File:Moonshade Earring icon.pngFile:Moonshade Earring description.png
File:Friomisi Earring icon.png
File:Shiva Ring +1 icon.pngFile:Shiva Ring +1 description.png File:Karieyh Ring +1 icon.pngFile:Karieyh Ring +1 description.png
File:Senuna's Mantle description.png
File:Eschan Stone icon.png File:Horos Tights +3 description.png

Utilities:

MDT  
File:Dampening Tam icon.pngFile:Dampening Tam description.png File:Odnowa Earring +1 icon.png File:Odnowa Earring icon.png
File:Tu. Harness +1 icon.pngFile:Tu. Harness +1 description.png File:Turms Mittens +1 icon.pngFile:Turms Mittens +1 description.png File:Purity Ring icon.png
File:Senuna's Mantle description.png
File:Mummu Kecks +2 description.png File:Ahosi Leggings description.png
PDT  
File:Meghanada Visor +2 description.png File:Loricate Torque +1 icon.png
File:Horos Casaque +3 description.png File:Meg. Gloves +2 description.png
File:Moonlight Ring icon.pngFile:Moonlight Ring description.png
File:Senuna's Mantle description.png
File:Mummu Kecks +2 description.png File:Ahosi Leggings description.png
MEVA  
File:Turms Cap +1 icon.pngFile:Turms Cap +1 description.png File:Hearty Earring description.png
File:Tu. Harness +1 icon.pngFile:Tu. Harness +1 description.png File:Raetic Bangles +1 icon.pngFile:Raetic Bangles +1 description.png File:Purity Ring icon.png File:Icecrack Ring icon.pngFile:Icecrack Ring description.png
File:Senuna's Mantle description.png
File:Turms Subligar +1 icon.pngFile:Turms Subligar +1 description.png File:Ahosi Leggings description.png
FC  
File:Orunmila's Torque icon.pngFile:Orunmila's Torque description.png File:Enchntr. Earring +1 icon.pngFile:Enchntr. Earring +1 description.png File:Loquac. Earring icon.pngFile:Loquac. Earring description.png
File:Adhemar Jacket +1 icon.png
File:Leyline Gloves icon.pngFile:Leyline Gloves description.png
File:Prolix Ring icon.png
File:Senuna's Mantle description.png
  • Enmity:

Can use Senuna's Mantle with Enmity +10.

Enmity  
File:Iron Gobbet description.png
File:Unmoving Collar +1 icon.png
File:Emet Harness +1 icon.png File:Horos Bangles +3 description.png File:Provocare Ring description.png
File:Kasiri Belt icon.pngFile:Kasiri Belt description.png File:Zoar Subligar +1 icon.png File:Ahosi Leggings description.png